Jay takes great pride in keeping his boat in pristine condition and was researching for a better solution to keep his non-skid clean from his fishing trips. As a long standing boater, he knew the traditional strategy of waxing the non-skid was not achieving the results he was looking for. Too many times, dirt, fish blood and other stains we get into the non-skid and be difficult to get out.
He reached out to us to inquiry if our boat fiberglass top coating would solve his problem. Coating the non-skid has become a bigger request from our customers and one we can help them with. For his boat, we completed a full restoration and ceramic coating application to;
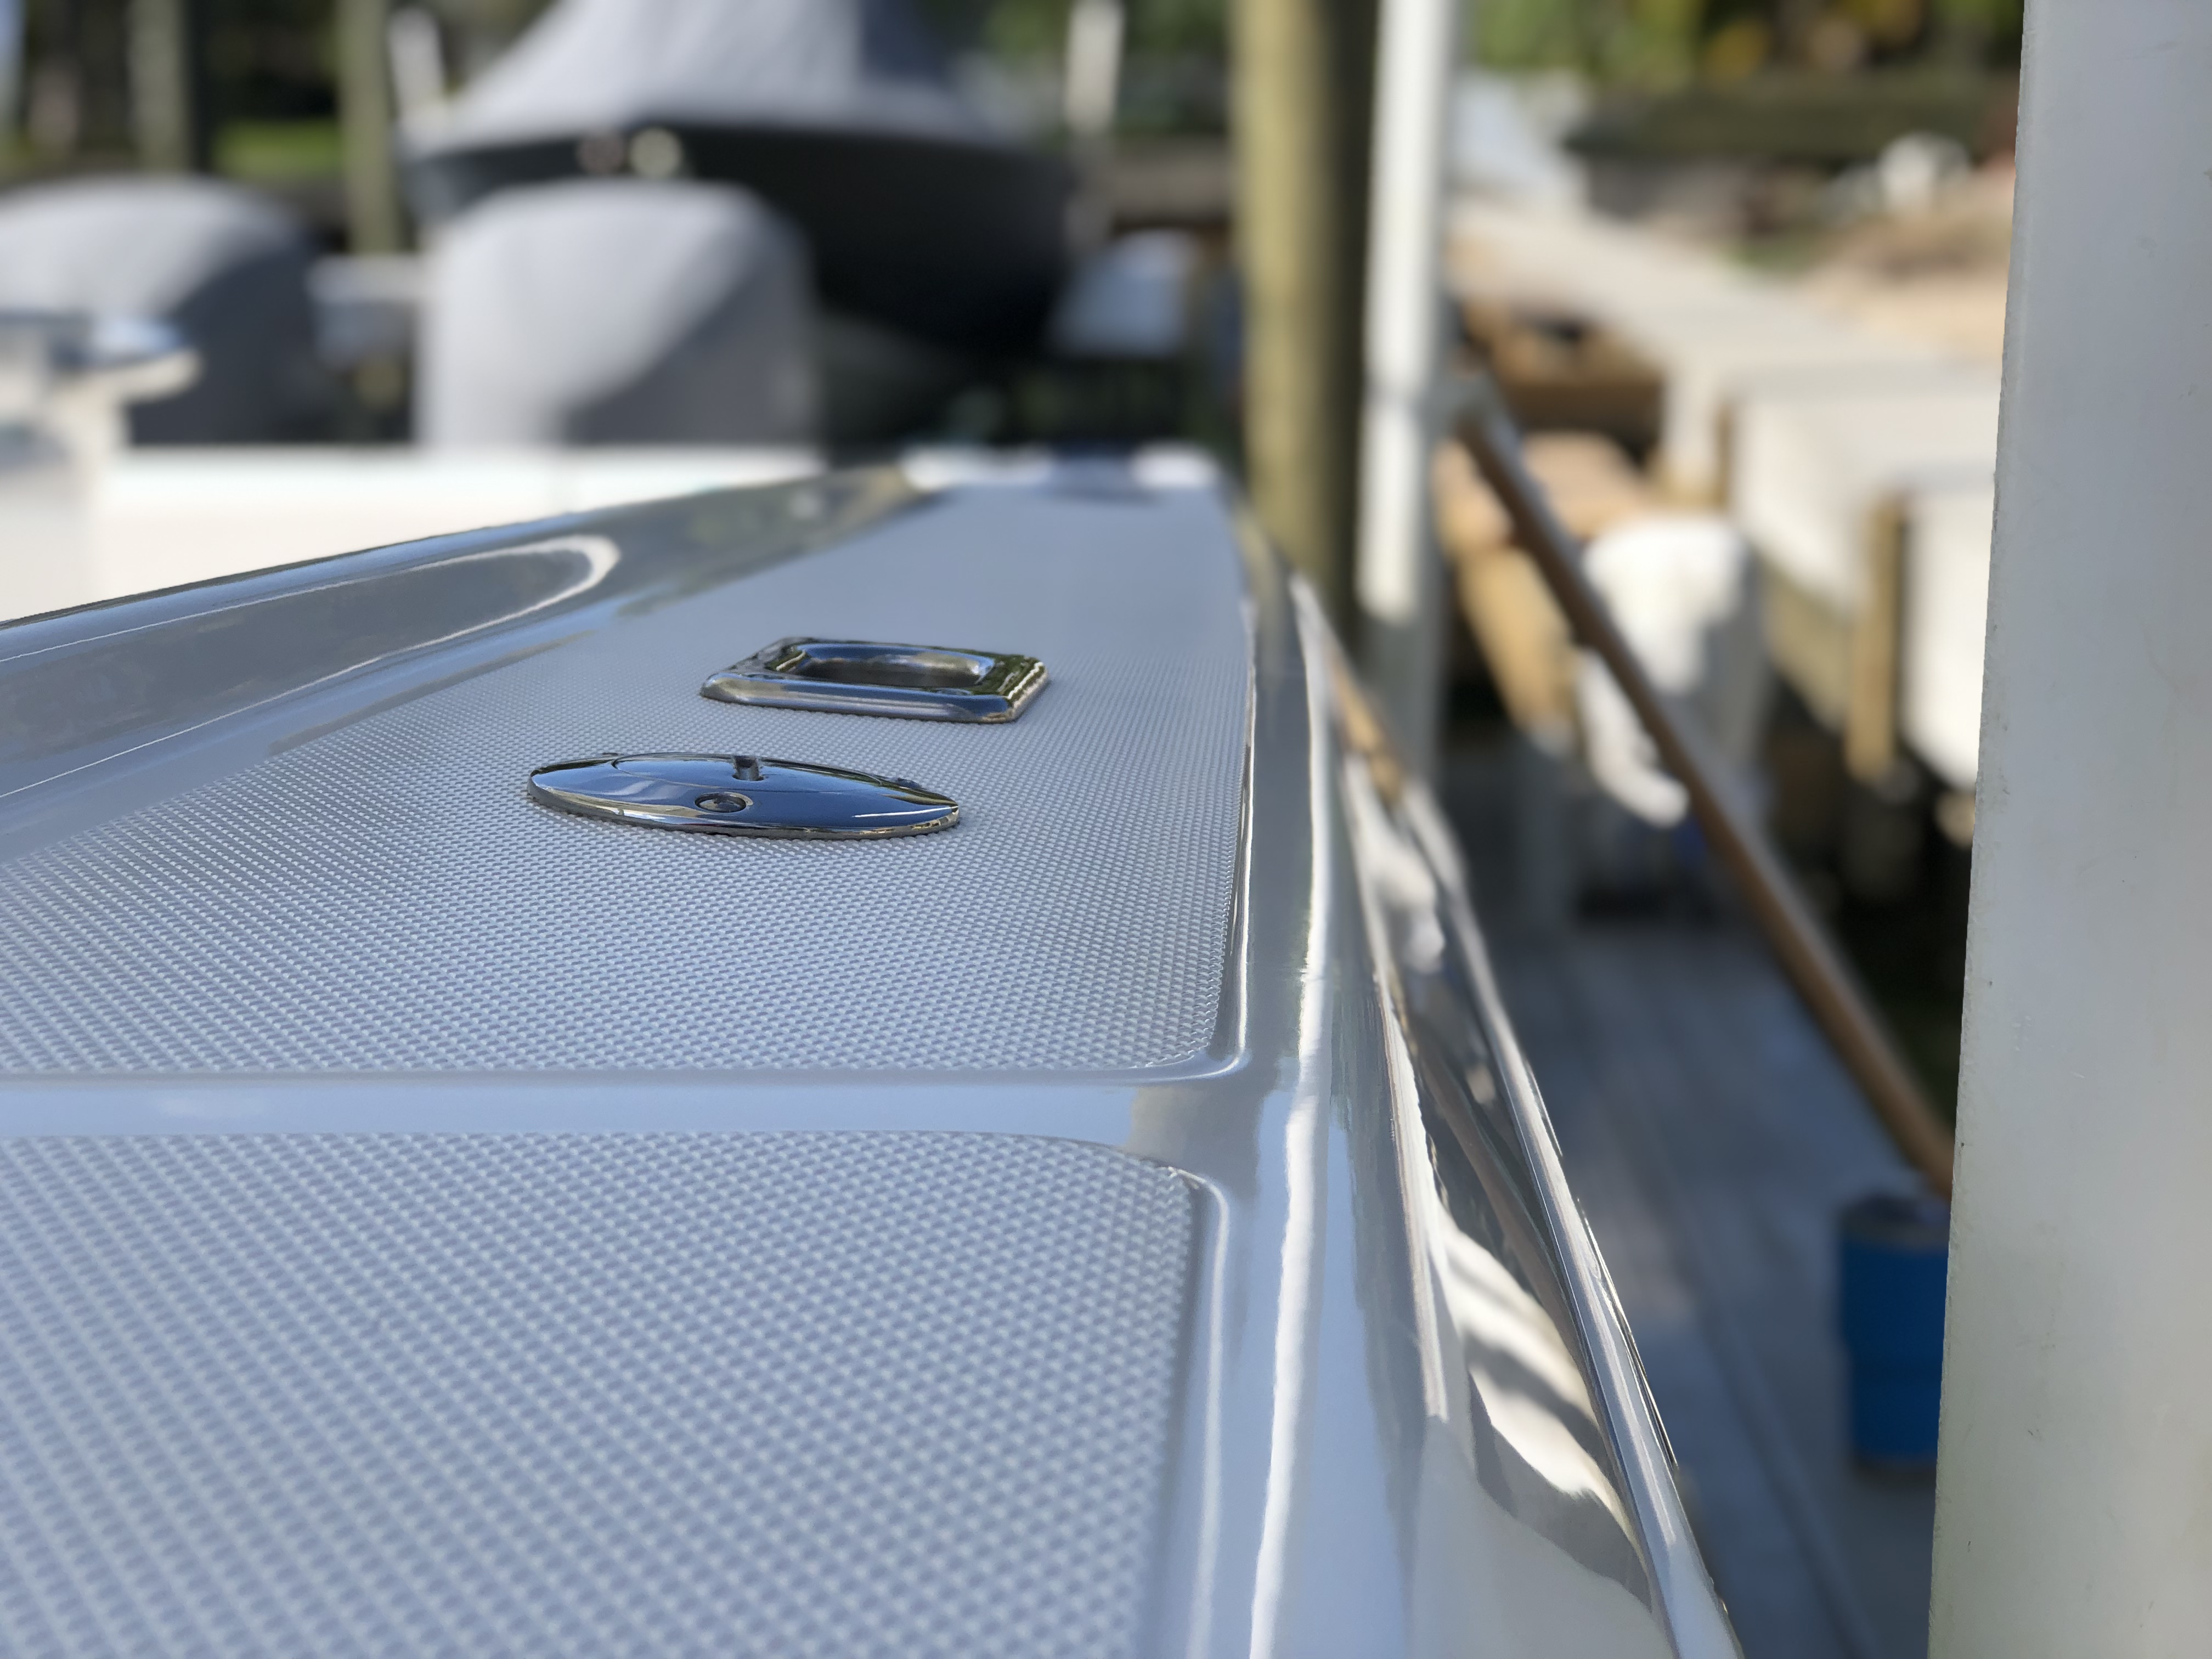
• Transom
• Top of the t-top
• All of the non-skid
• The tracks of the fish boxes
• Gunwales
• All of the flat fiberglass on the top-side including the navigational dash, captain seat and side walls
The 34' Venture did present a number of challenges during the application process and a worthwhile read for any boat owner who is either thinking about applying ceramic coatings themselves or hiring a professional applicator.
- Boat Brand:
- Venture
- Length Overall:
- 34'
- Ceramic Coating To:
- The entire top side including non-skid
- Completion Time:
- 60.75 man hours
- Location:
- North Miami, FL
The 2007 34' Venture boat presented a number of unexpected challenges during the application process. For first time readers, who are starting the process to learn more about boat fiberglass top coating to protect your investment, you may be surprised to learn the prices ranges for such a service.
As an example, when we receive a call to quote a boat fiberglass top coating application for a boat, we typically start at $80 - 120 per linear foot, dependent on a number of factors. The condition of the boat is one of the major factors to determine the price as a strong indicator to how many steps are required before applying the ceramic coating.
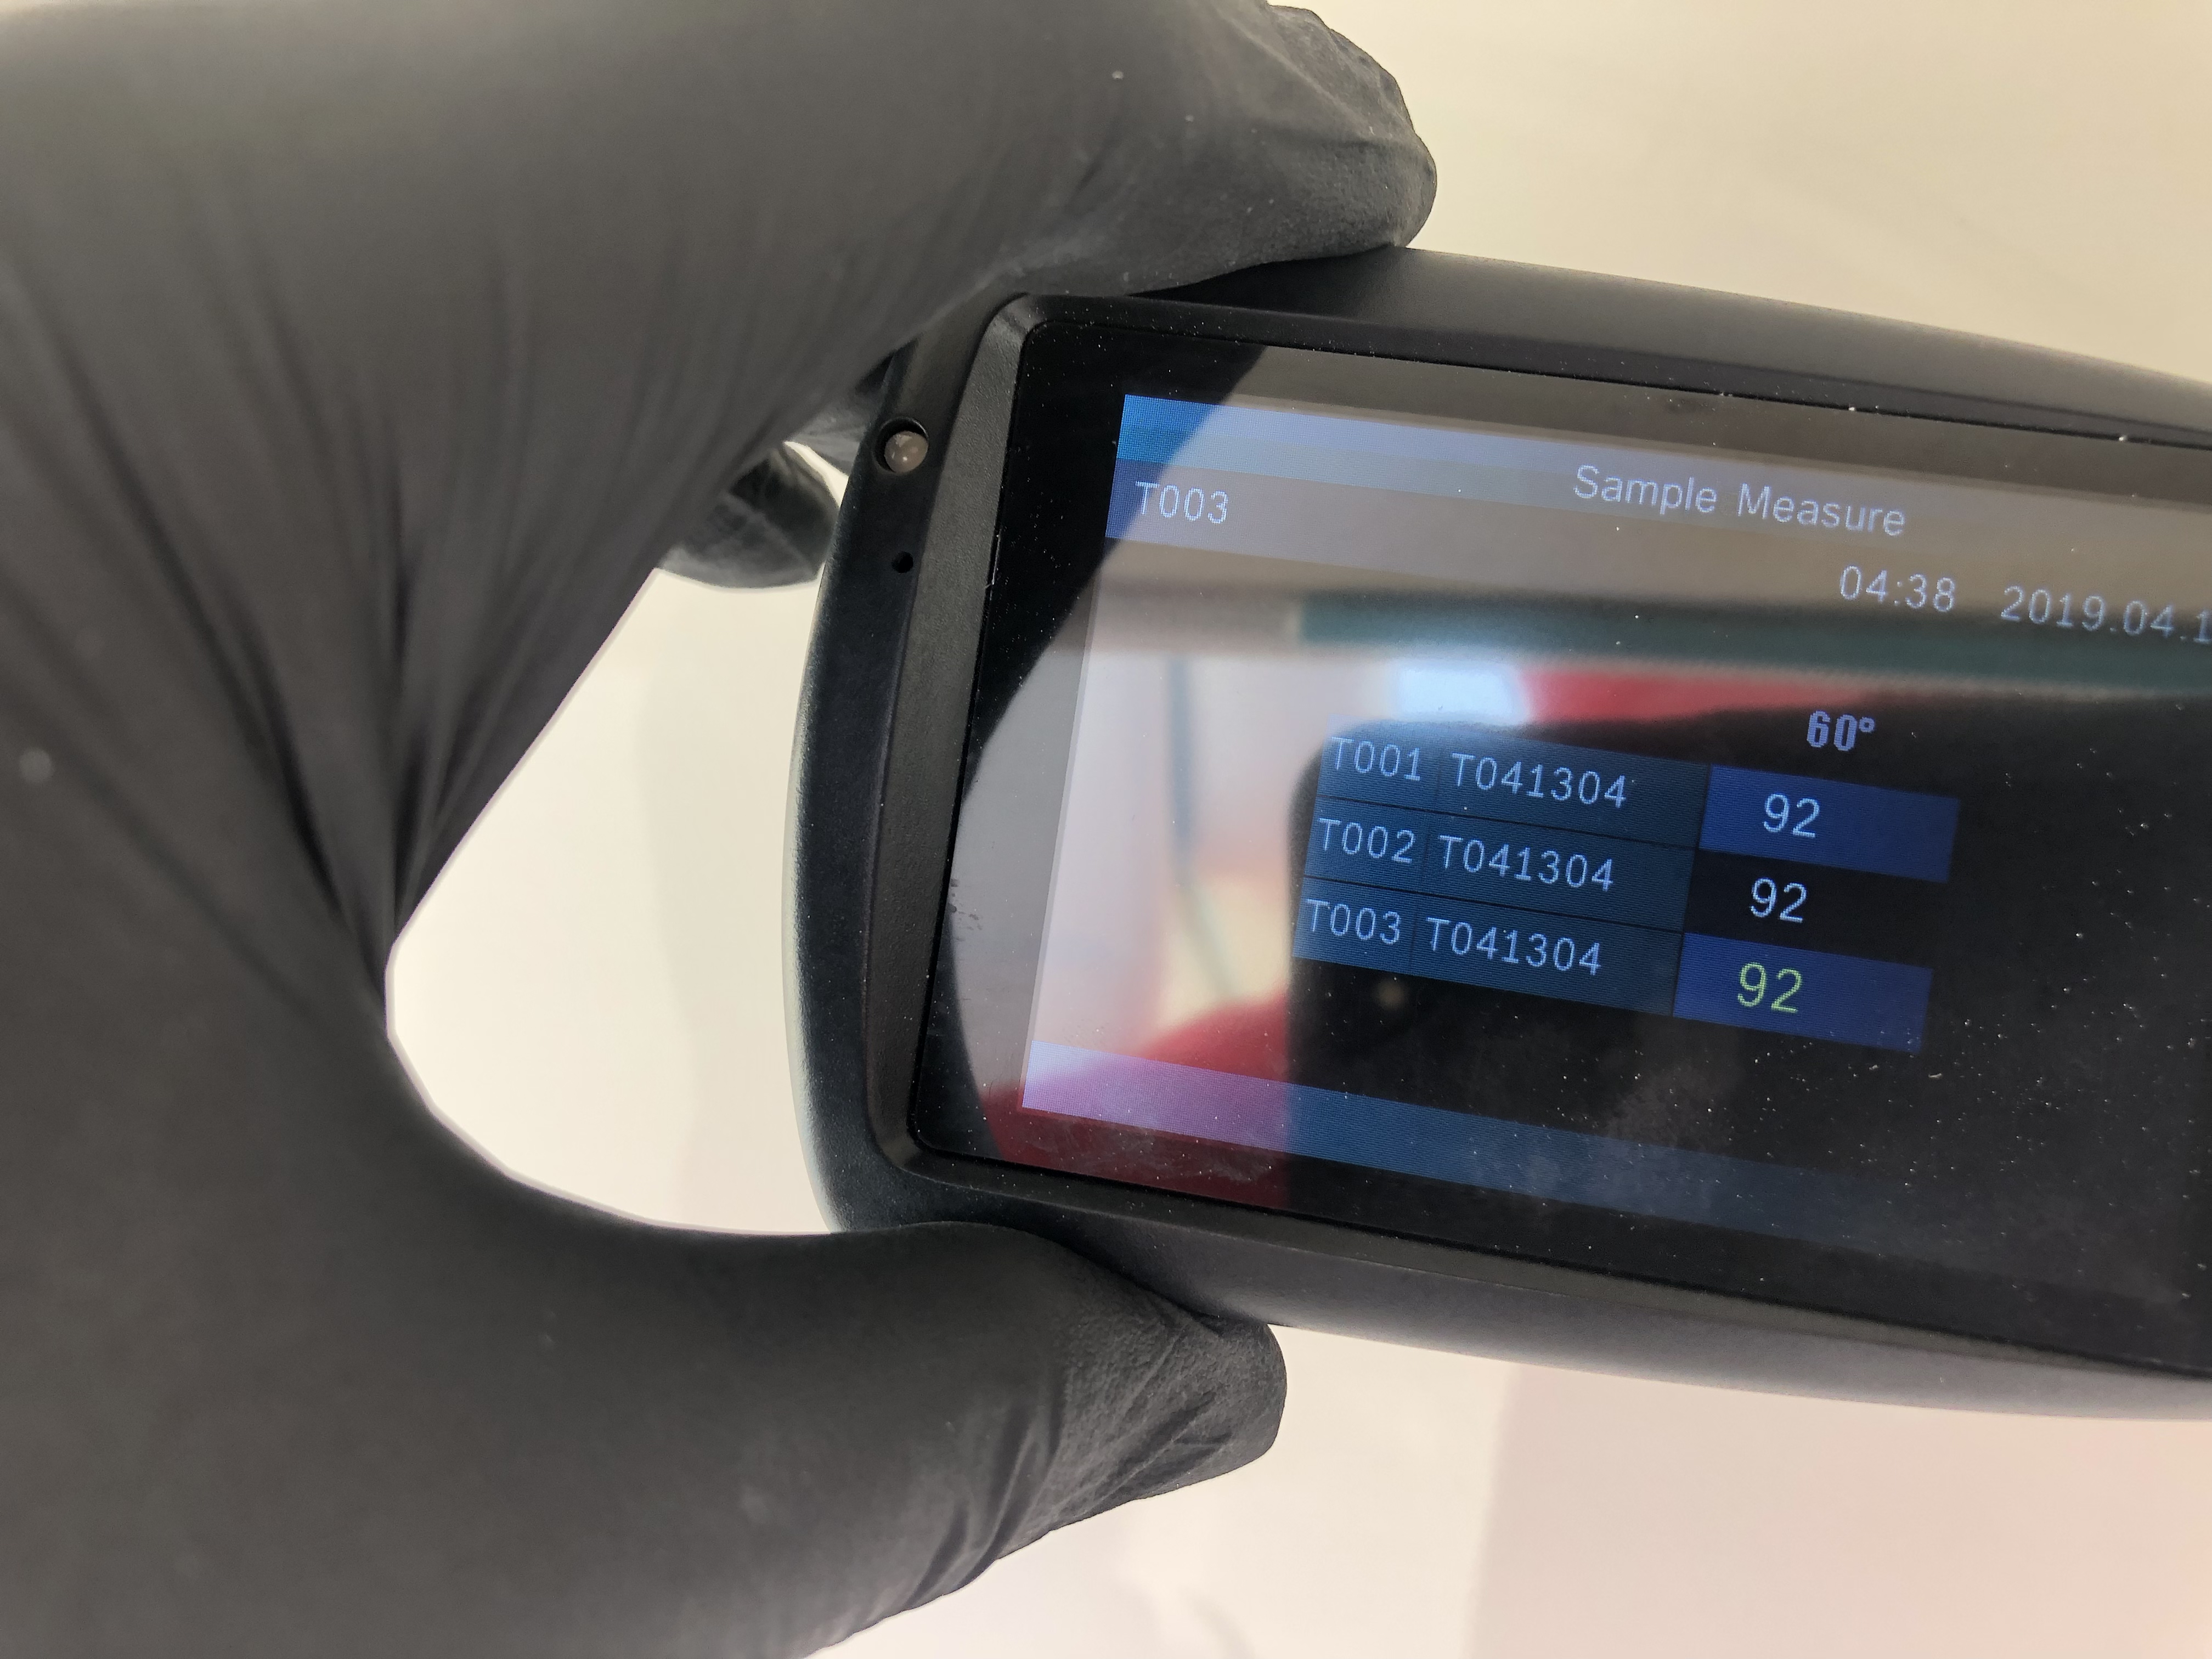
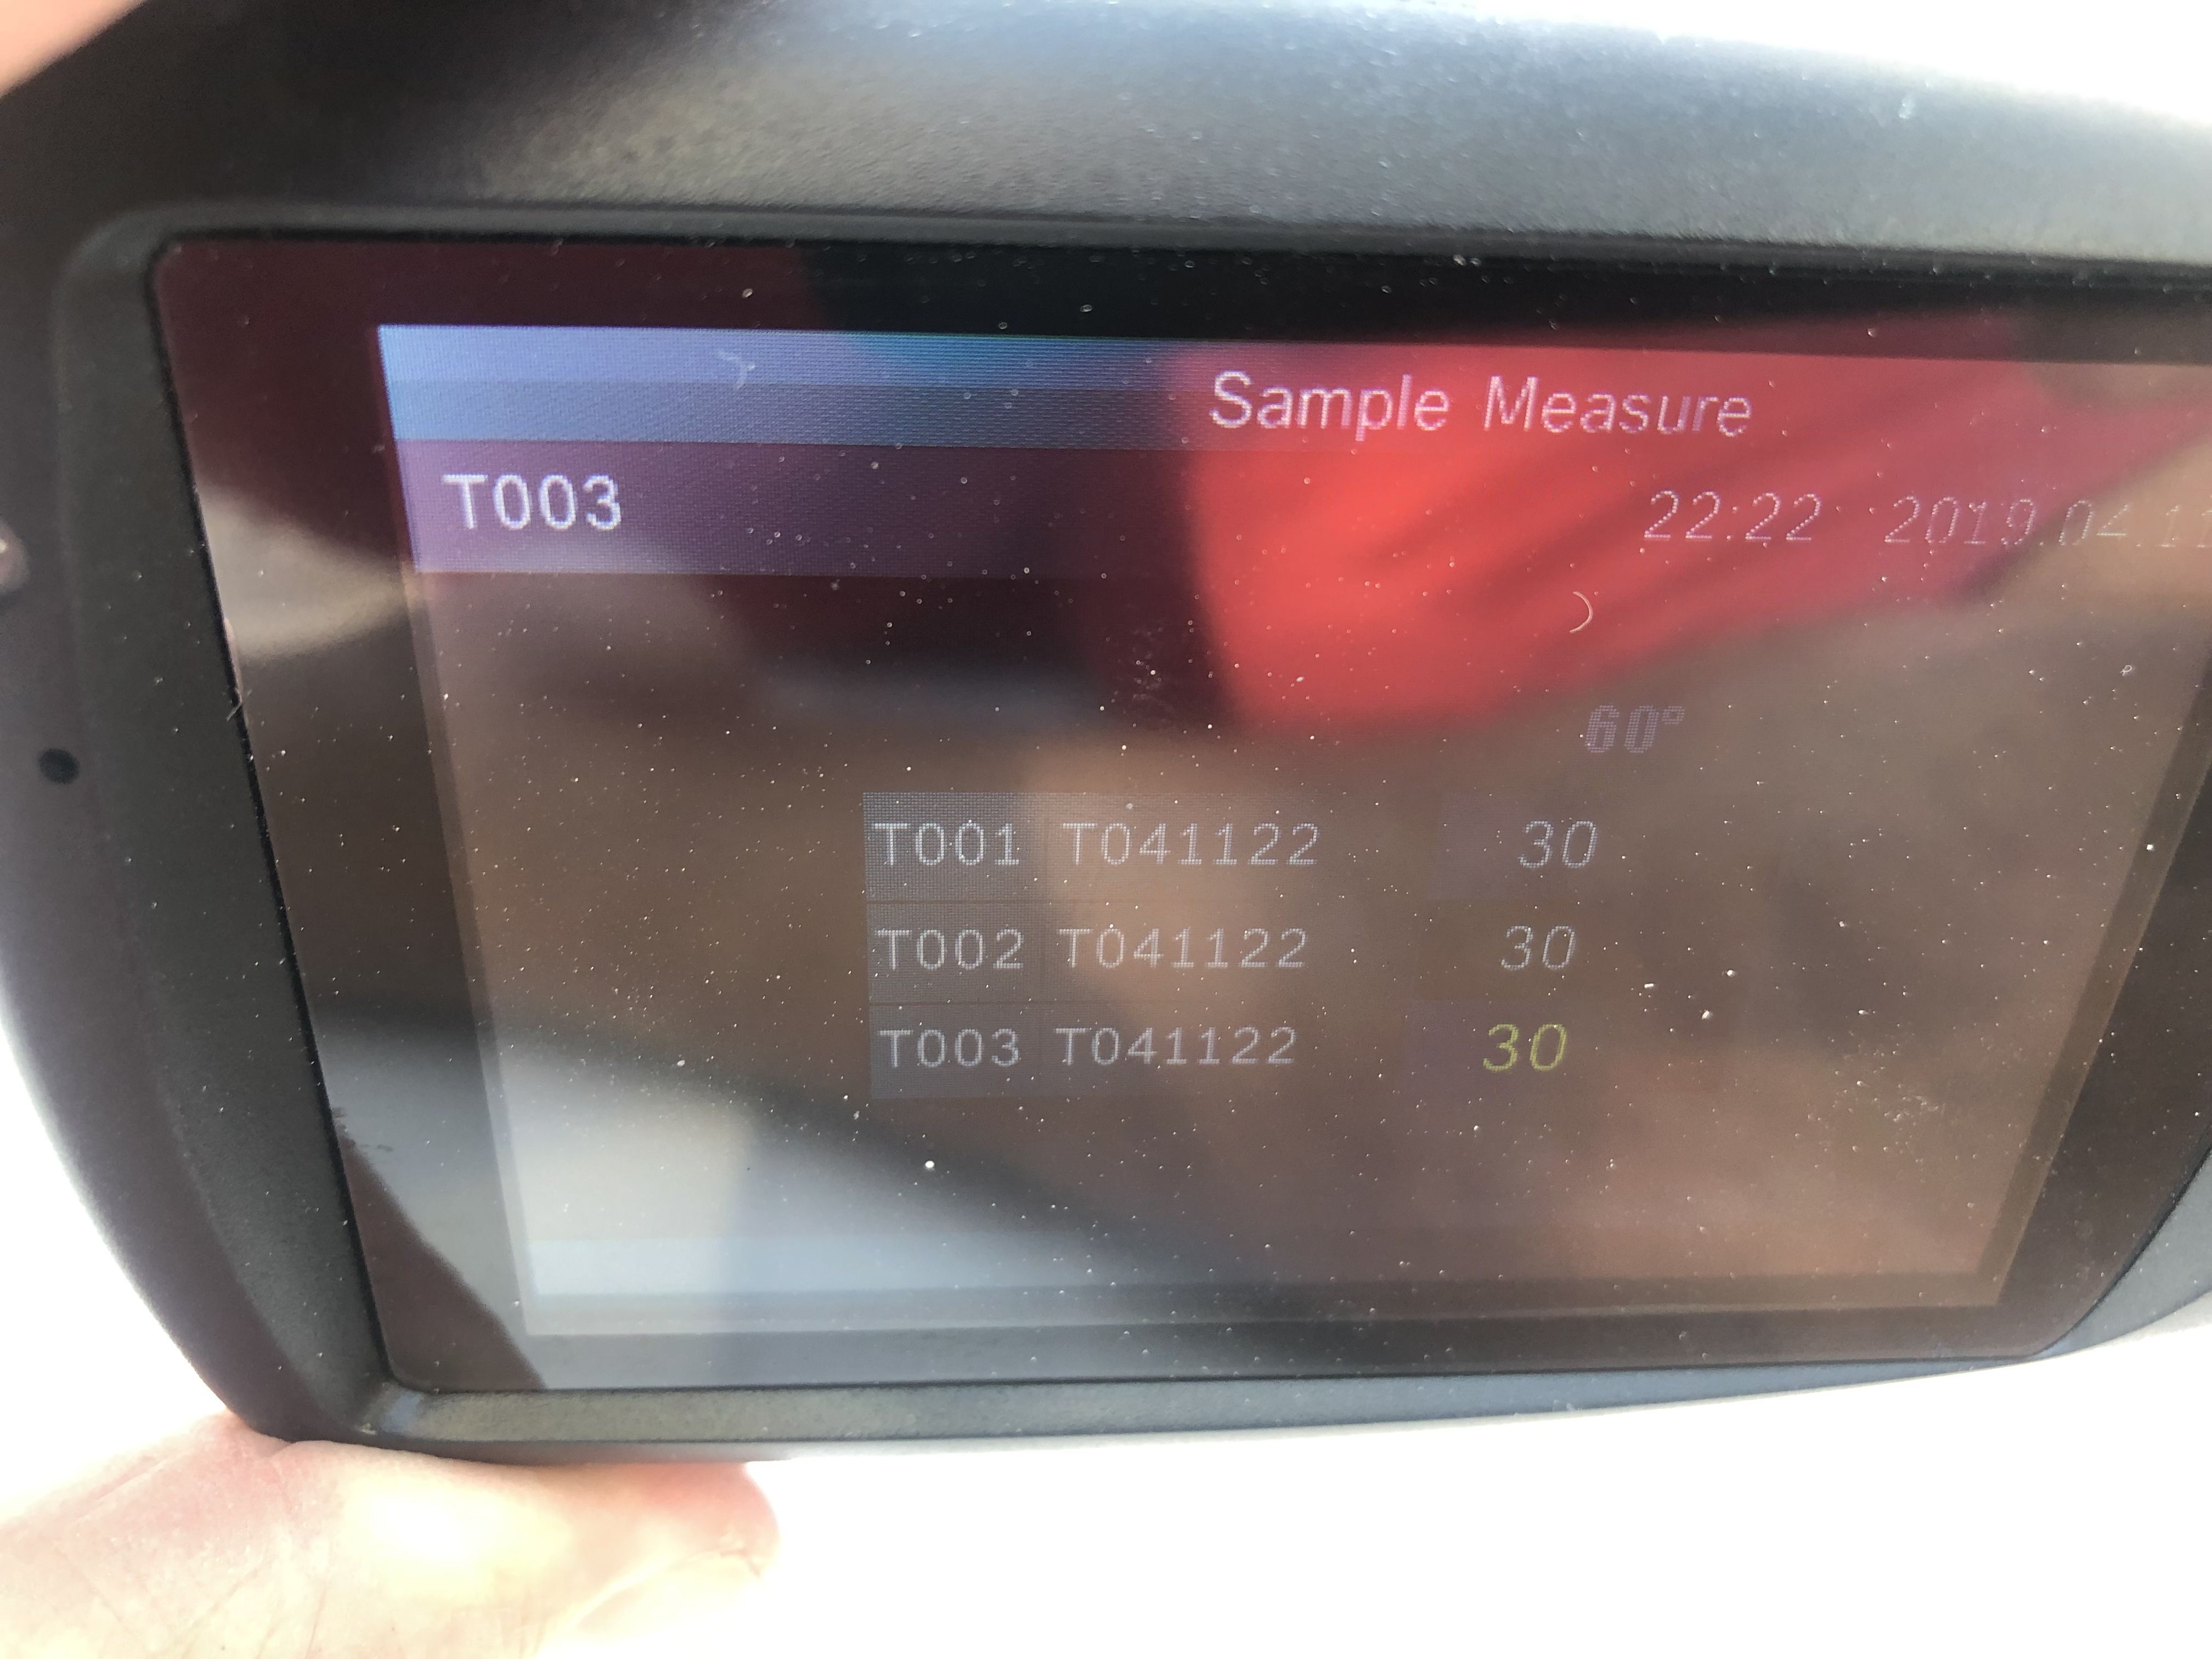
As a recommended strategy, we always encourage meeting directly with the boat owner to walk around the boat, inspect the current condition, take gloss meter readings and discuss the appropriate sections to be coated.
In this particular instance with Jay, we met in the afternoon a week prior to the work commencing to walk through that process. And, during the initial walk through, we were surprised to the good condition of the surface, minor scratches throughout and most importantly, relatively decent gloss meter readings; 30's - 60's. We get worried when the readings are in the single digits.
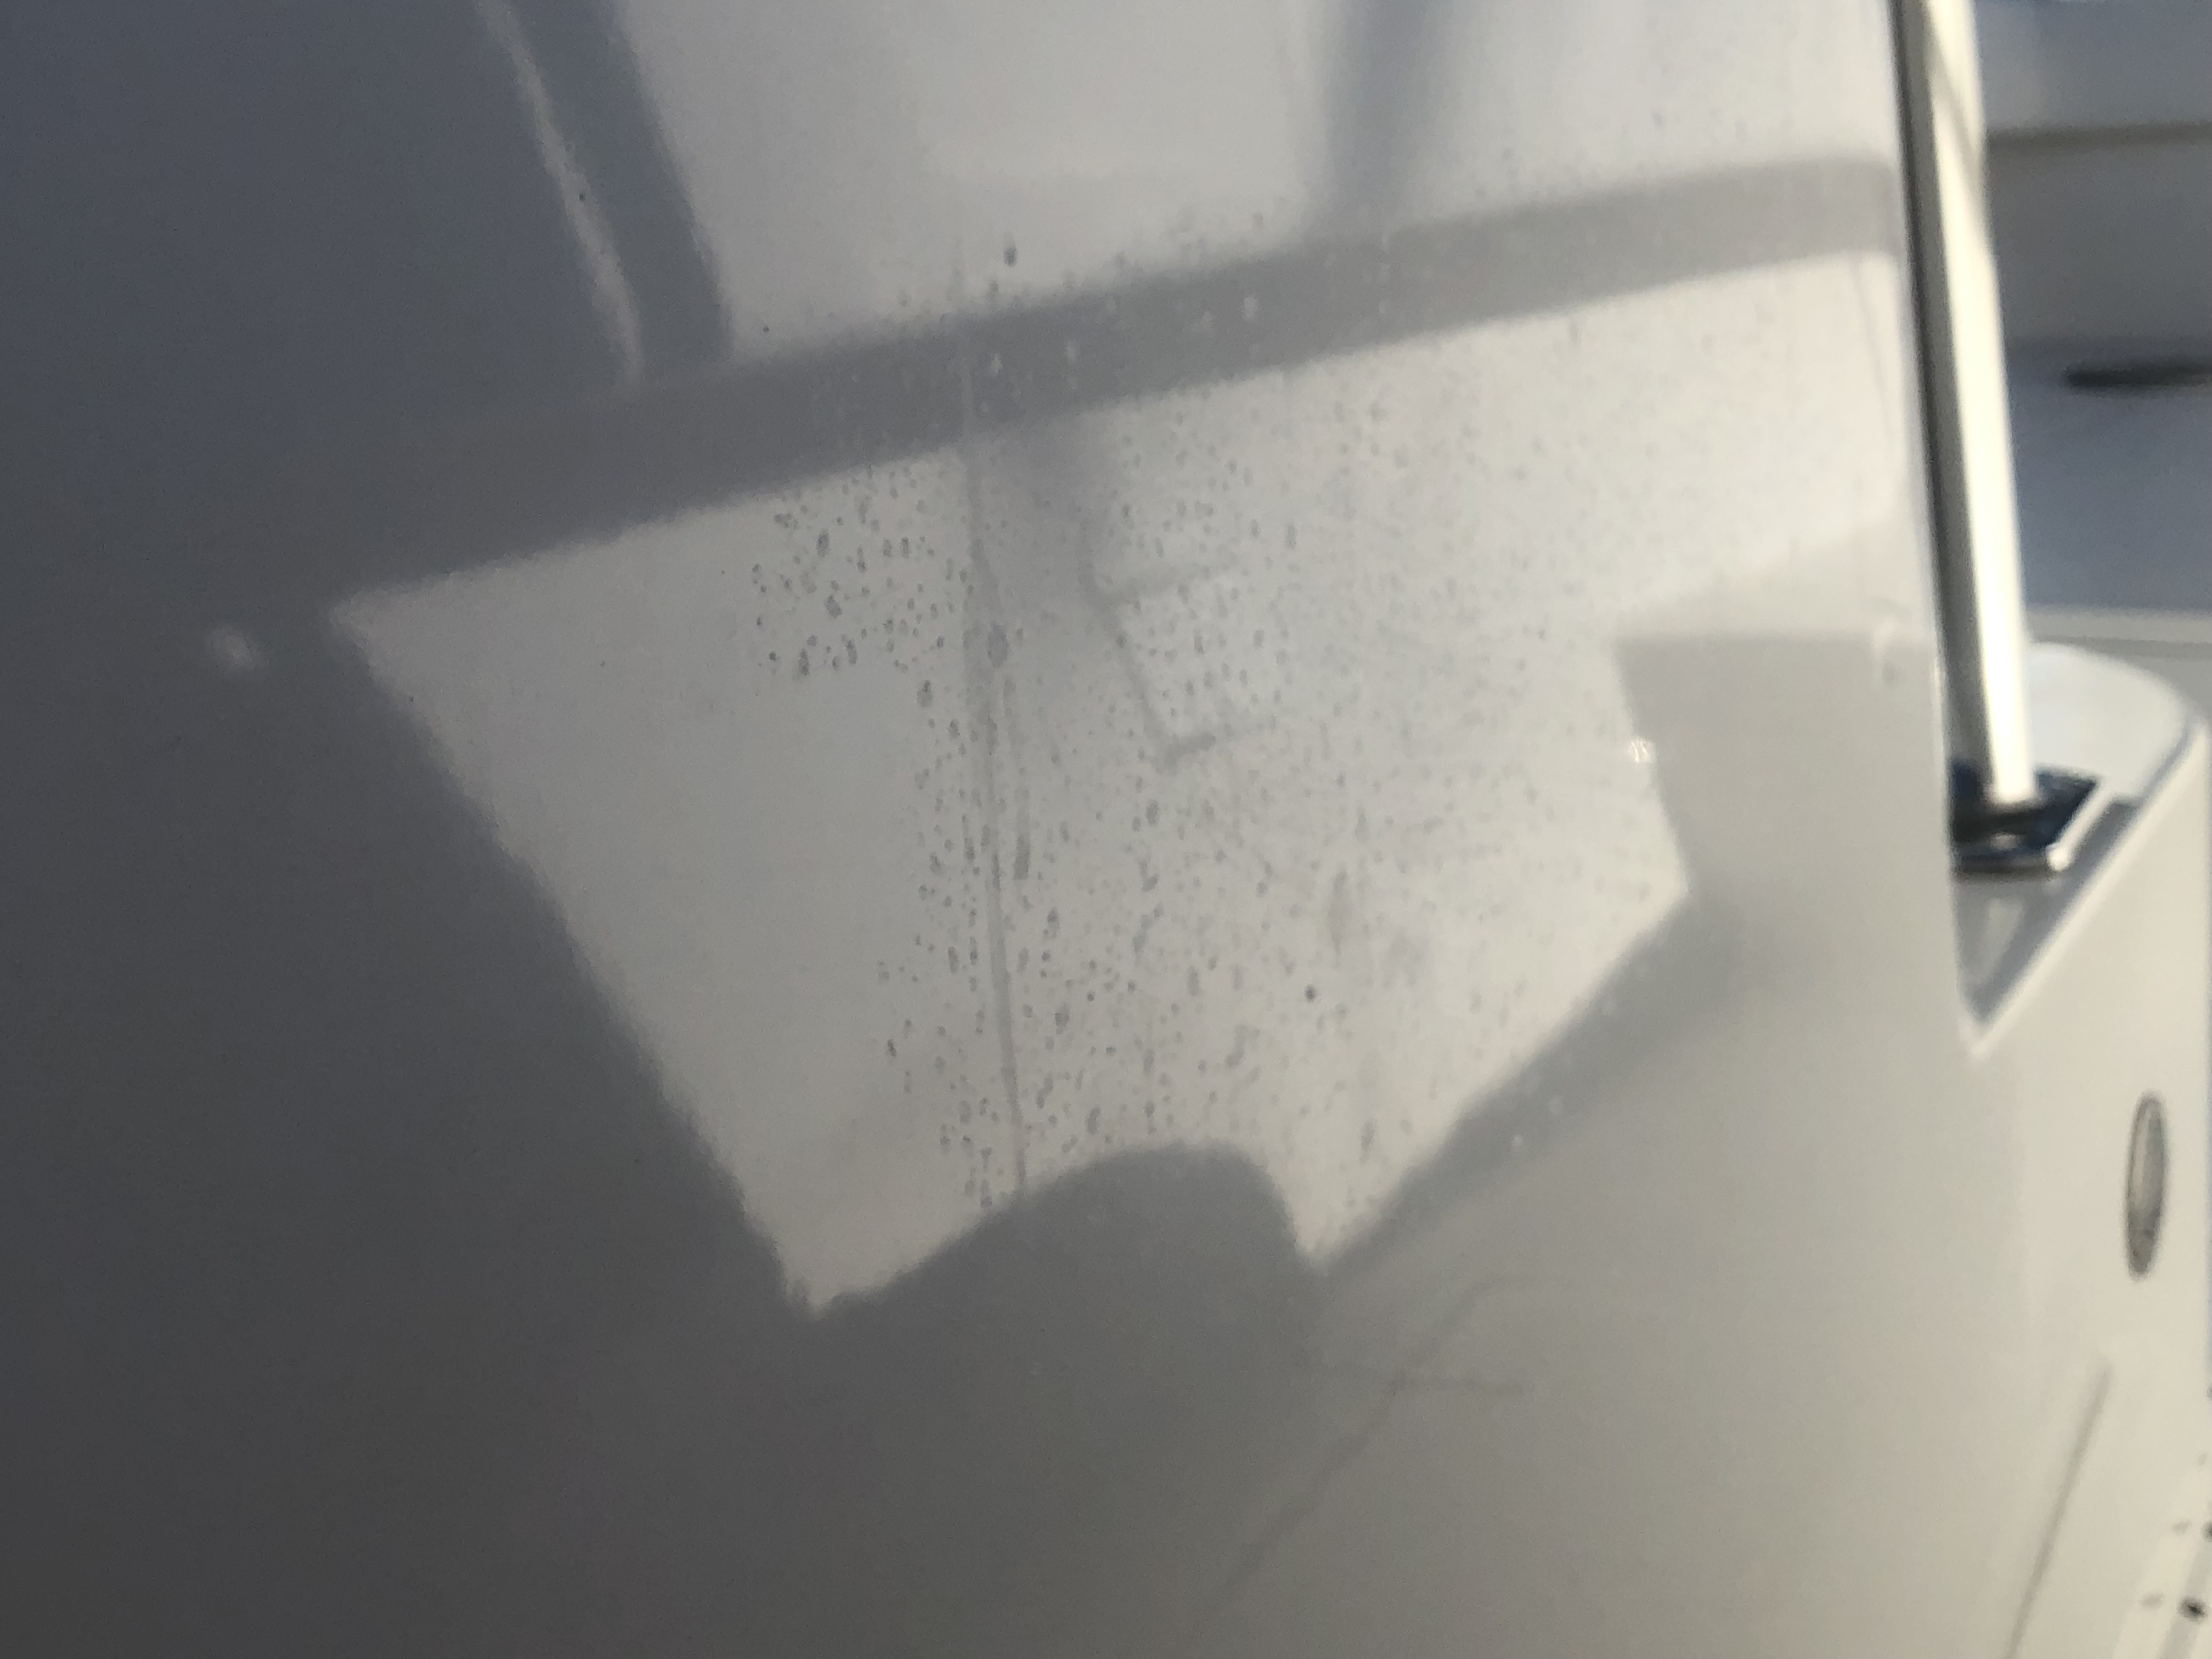
When we arrived to the boat to start the work, we noticed hard water spots in the surface of the fiberglass on the top side of the boat. These water marks were not noticeable during our initial walk through. One potential challenge could of been the dew on the surface in the morning, was showcasing those imperfections.
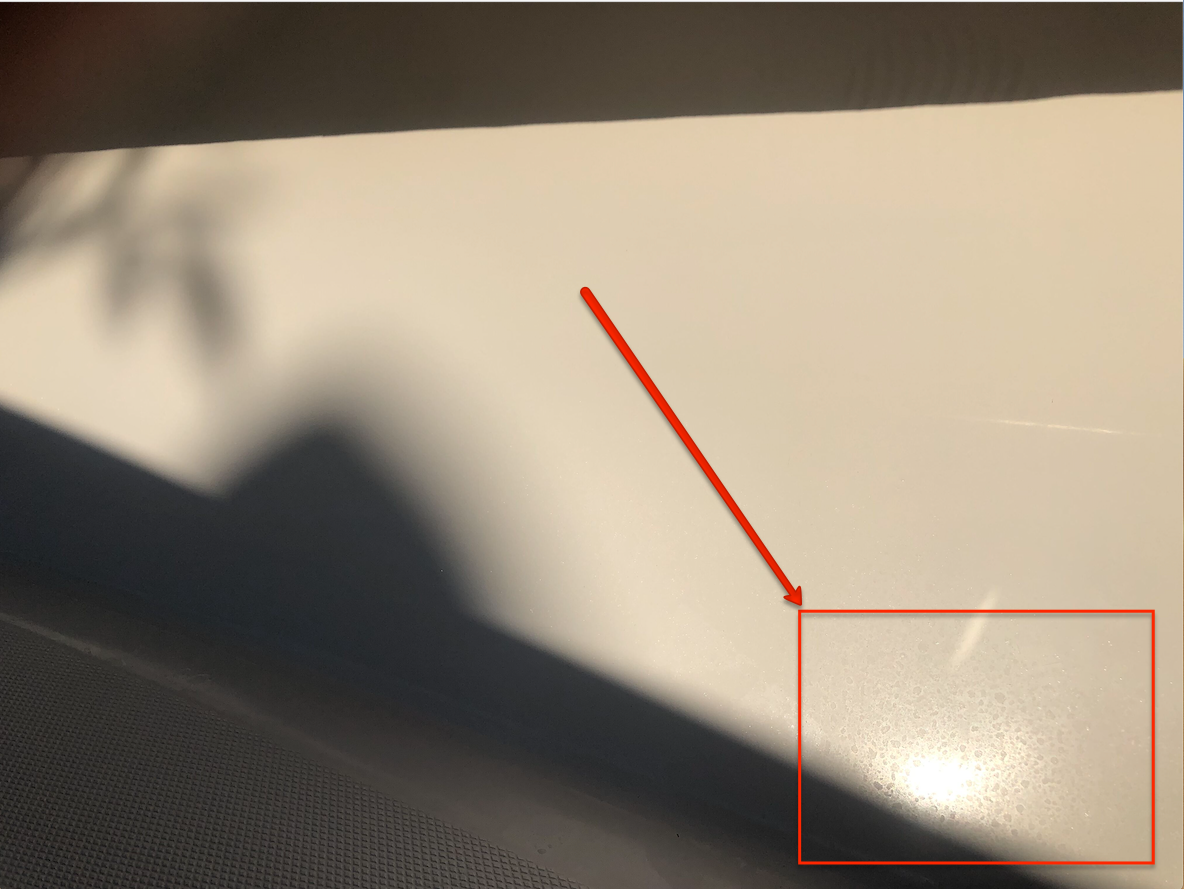
As shown in the photo above and in the highlighted section, you can see those pesky water marks in the surface of the fiberglass. As a result, during the restoration process, we want to remove all of the water marks, any minor scratches and get the gloss meter readings back into the 80's or the highest as possible.
What surprised us most was how challenging those water marks were to get out. More on that below!
Removing the water marks
For anyone who is working on their boat, either applying our boat fiberglass top coating or simply waxing, we would always recommend attempting several test spots across the boat to understand the proper steps. We always follow the same principles when arriving to a boat;
• Take gloss meter readings before (usually gives a good indication of the necessary steps)
• Test different compounds and pads to achieve the best results
• Polish the surface to boost the shine
• Sterilize the surface with our Surface Wipe
• Apply two (2) coats of our Top Coating Kit
• Spot wash the boat for delivery to the customer
A surprising thing happened the first morning of our work as when we attempted to use our medium cut nano compound with a medium density foam pad and our Rupes machine, the water marks did not come out of the surface and the shine did not increase. So, back to the drawing board.
Ultimately, after several different combinations, we ended up having to resort to heavy compound with wool pad and start to downgrade from there. We initially thought it would only require one pass of our medium compound and ended up turning into 5 buffing steps with varying compounds and pads. As you can imagine, this significantly increased the duration of the project.
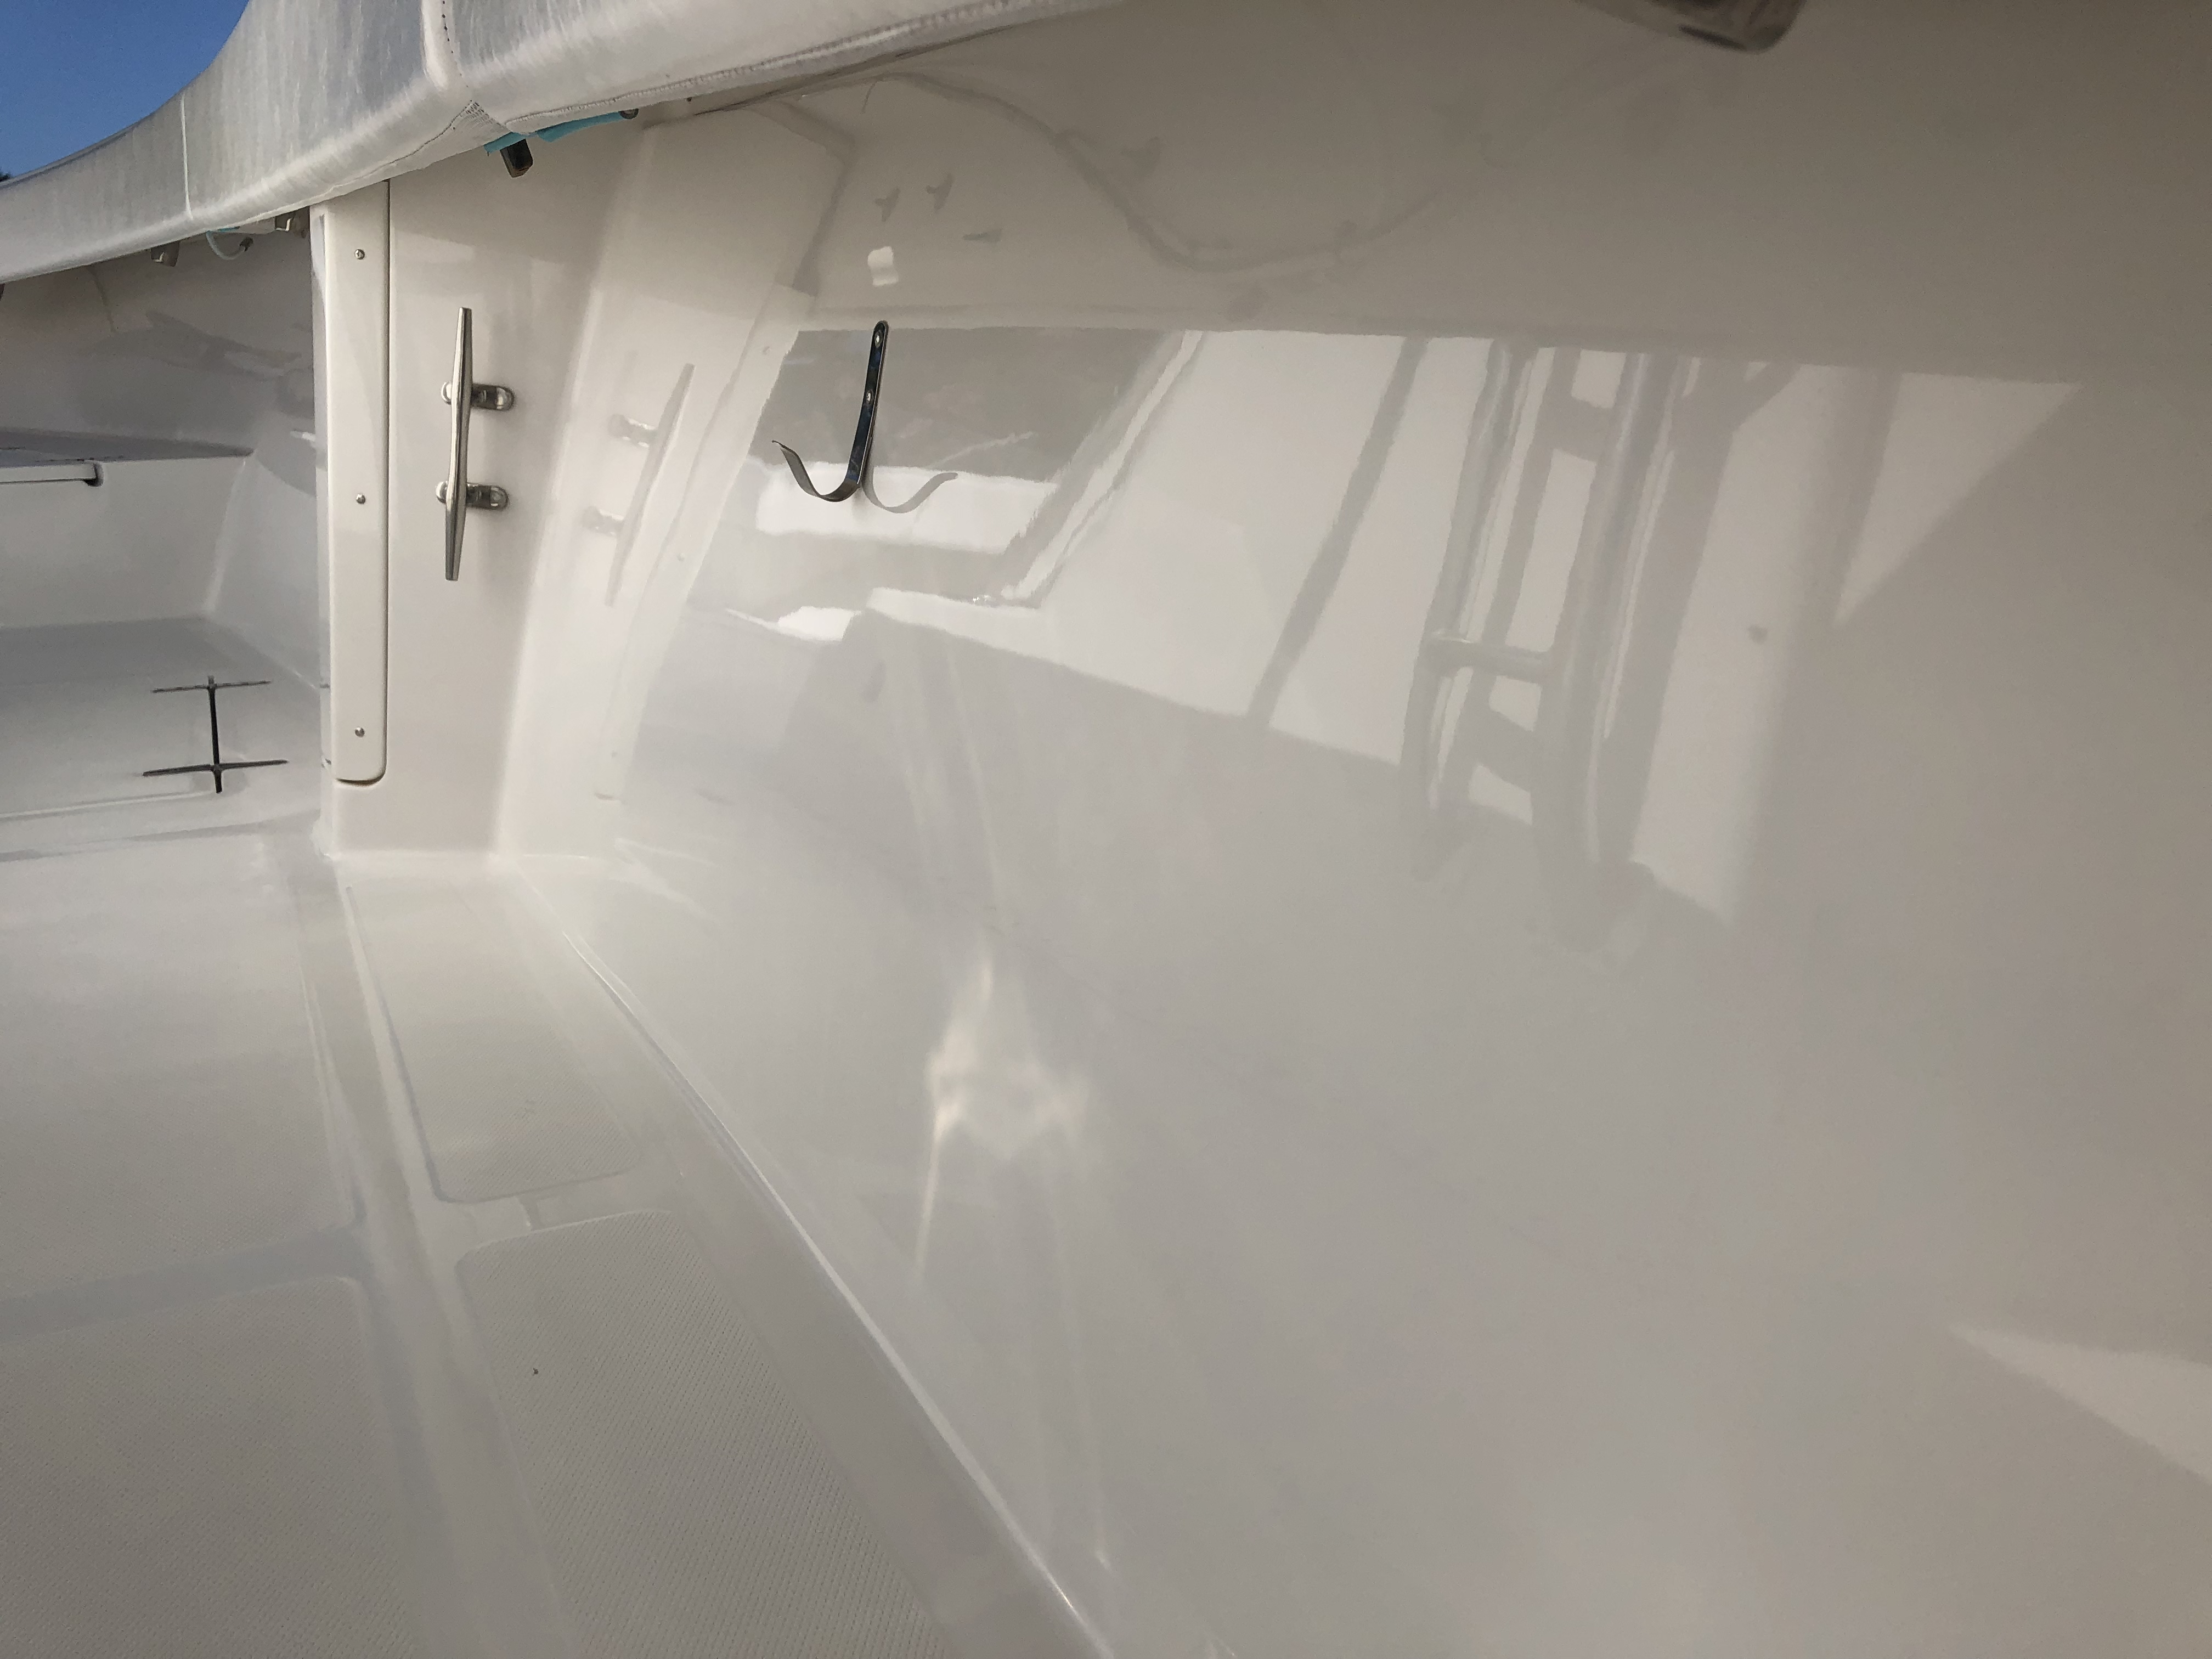
The photo below shows the fiberglass after removing all of the water spots from the surface.
The Time To Apply Our Boat Fiberglass Top Coating
For first time users of our ceramic coating, they are surprised how laborious and diligent you must be in the prep process to achieve optimal results. This includes first wiping down the entire surface with our Surface Wipe, which helps remove any decontaminants from the surface.
Then, pouring approximately the size of a quarter of the coating onto an application sponge and wiping a 2' by 2' section. We like to start by boxing off the section and filling in the area by going over the surface both vertically and horizontally.
Once, the 2' by 2' section is fully saturated, you are immediately wiping down the surface with a clean microfiber towel. The trick is to make sure there is no waiting time and you make sure every part of the liquid is removed from the surface.
The process includes applying two coats of the ceramic coating to the surface and ideally you would like the first coat to settle for an hour before applying the second coat.
Our recommendation is to start at the stern and work your way to the bow (working the 2' by 2' sections). By the time, you have completed one side the hull, you will be ready to start on the second coat at the stern.
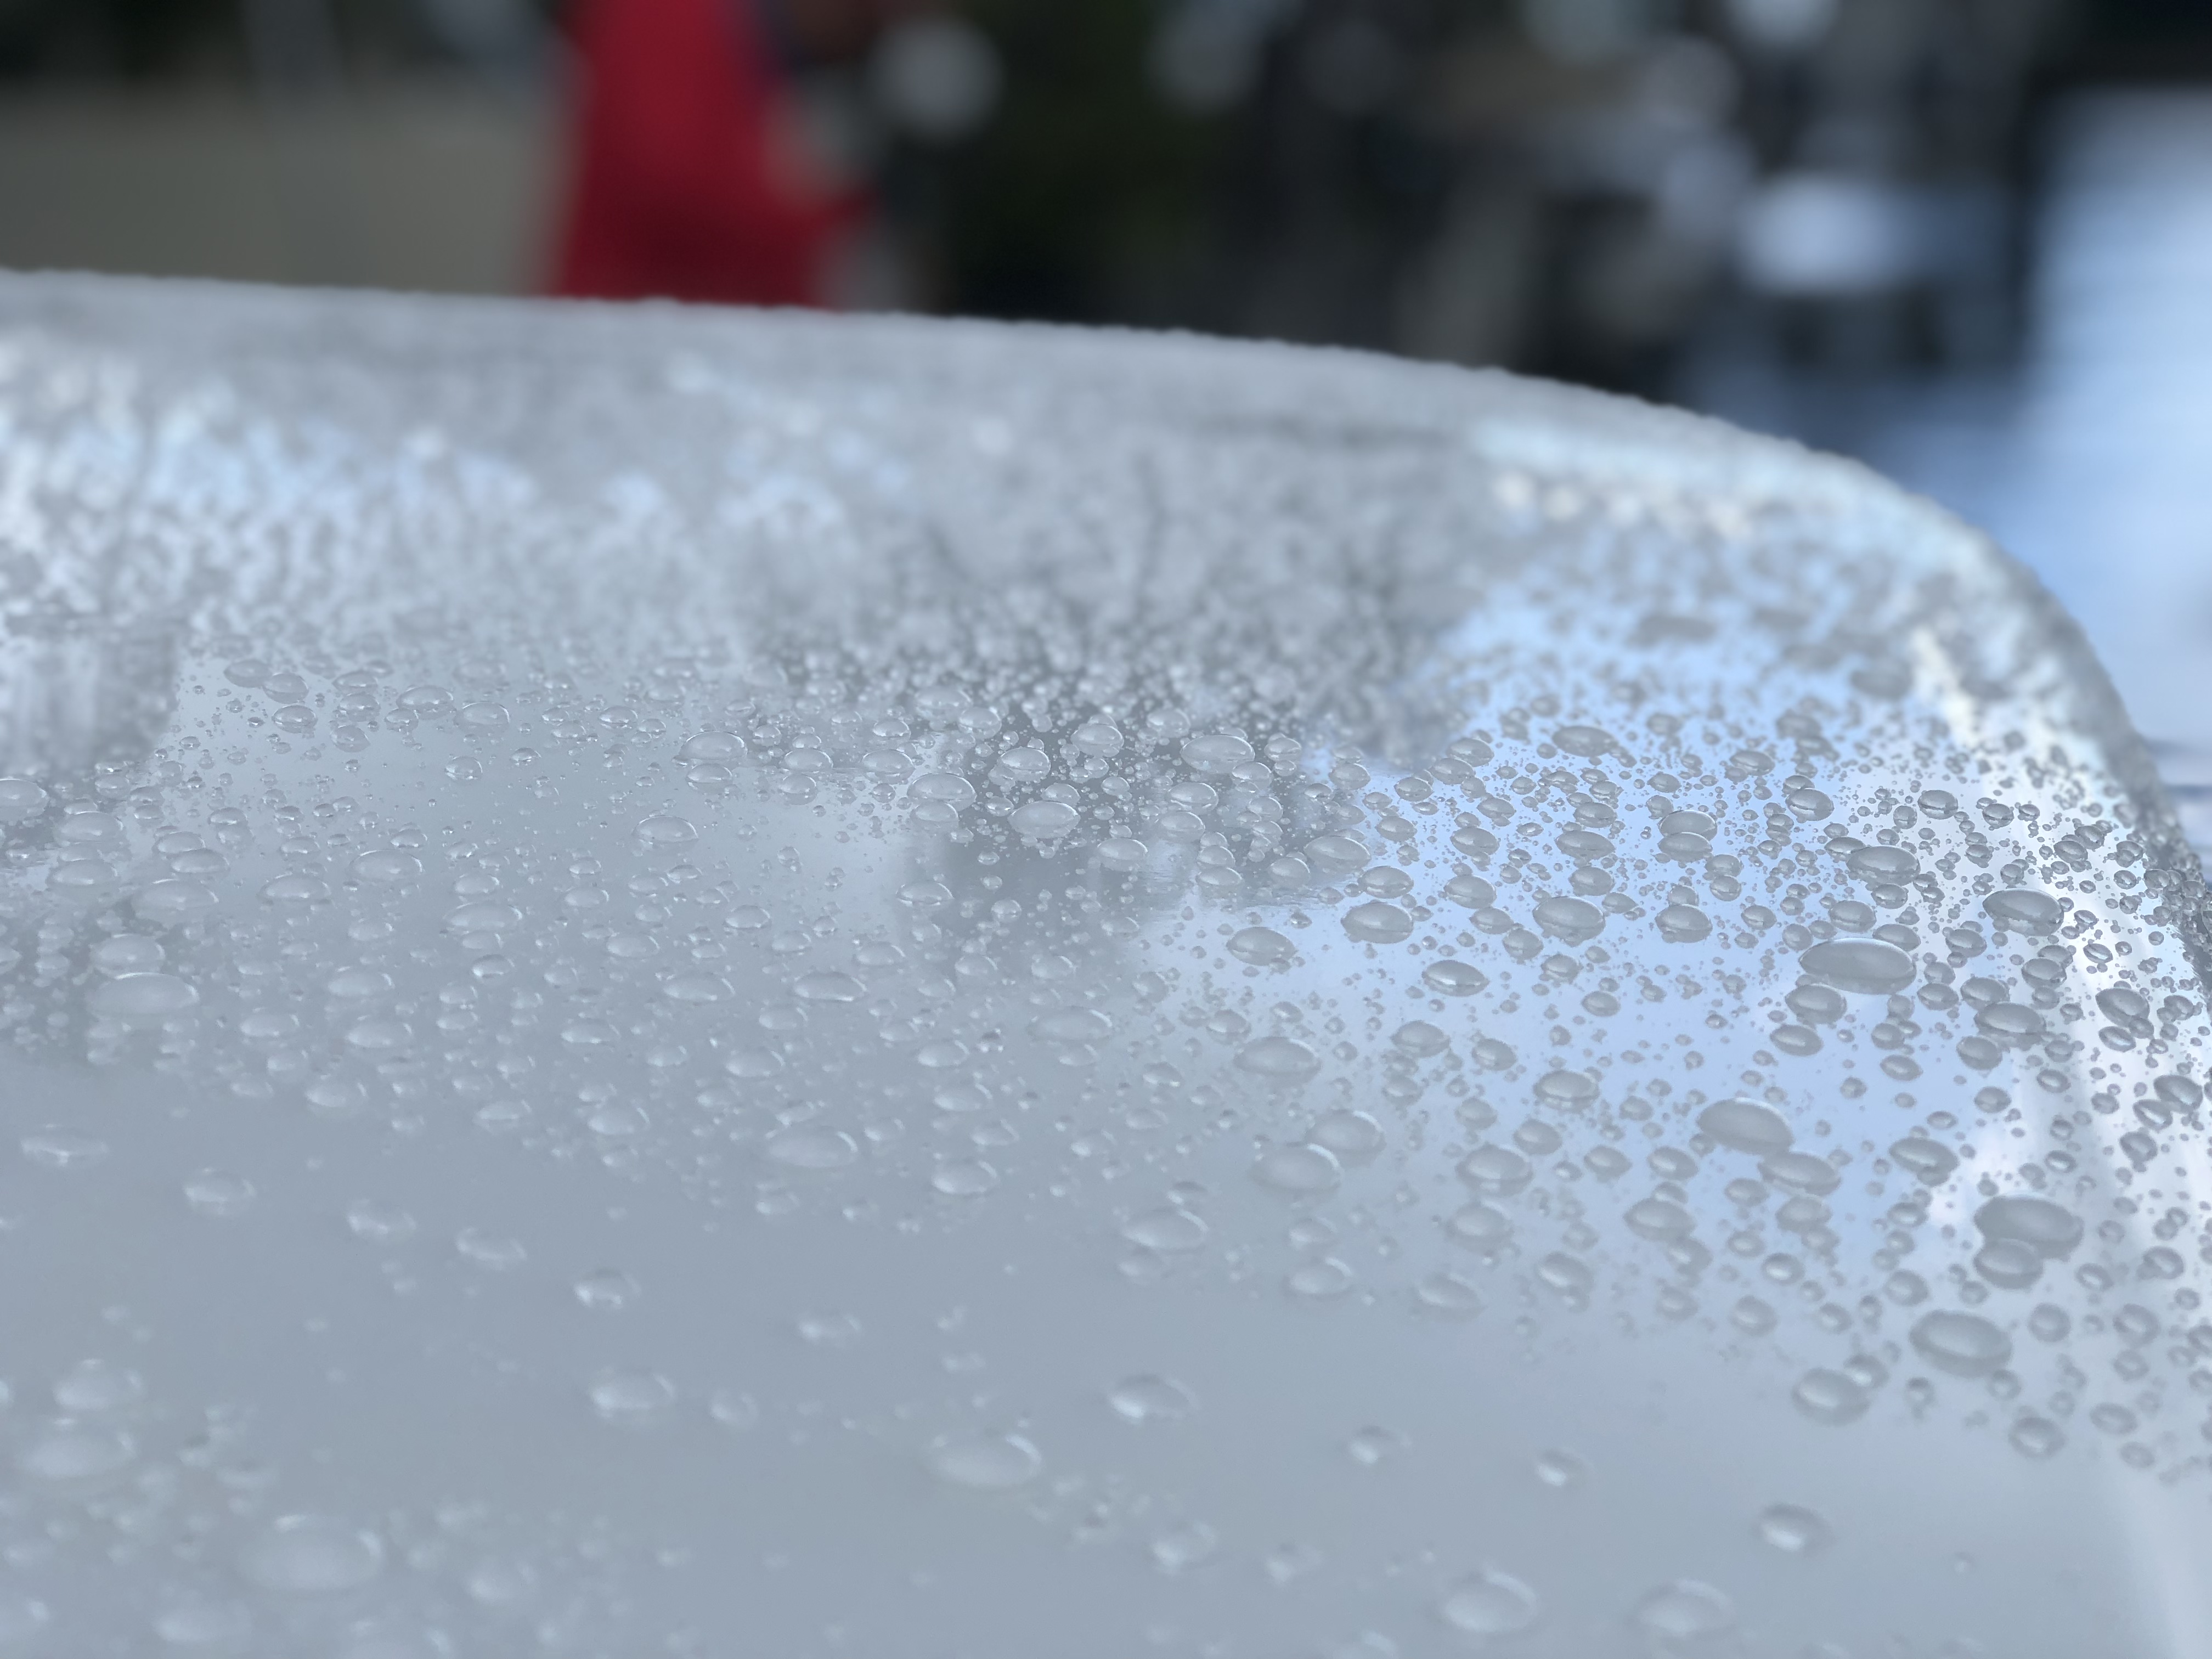
How To Tell An Area Has Been Ceramic Coated
After you have completed all of the restoration, prep and ceramic coating application steps, you may be wondering what you are looking for to ensure the area has been properly applied. Two indicators for you to look for;
1). The shine of the surface
2). Water beading up
During the project, we did encounter rain on the second day. The photo below shows the water beading up on the surface after the T-top had been coated.