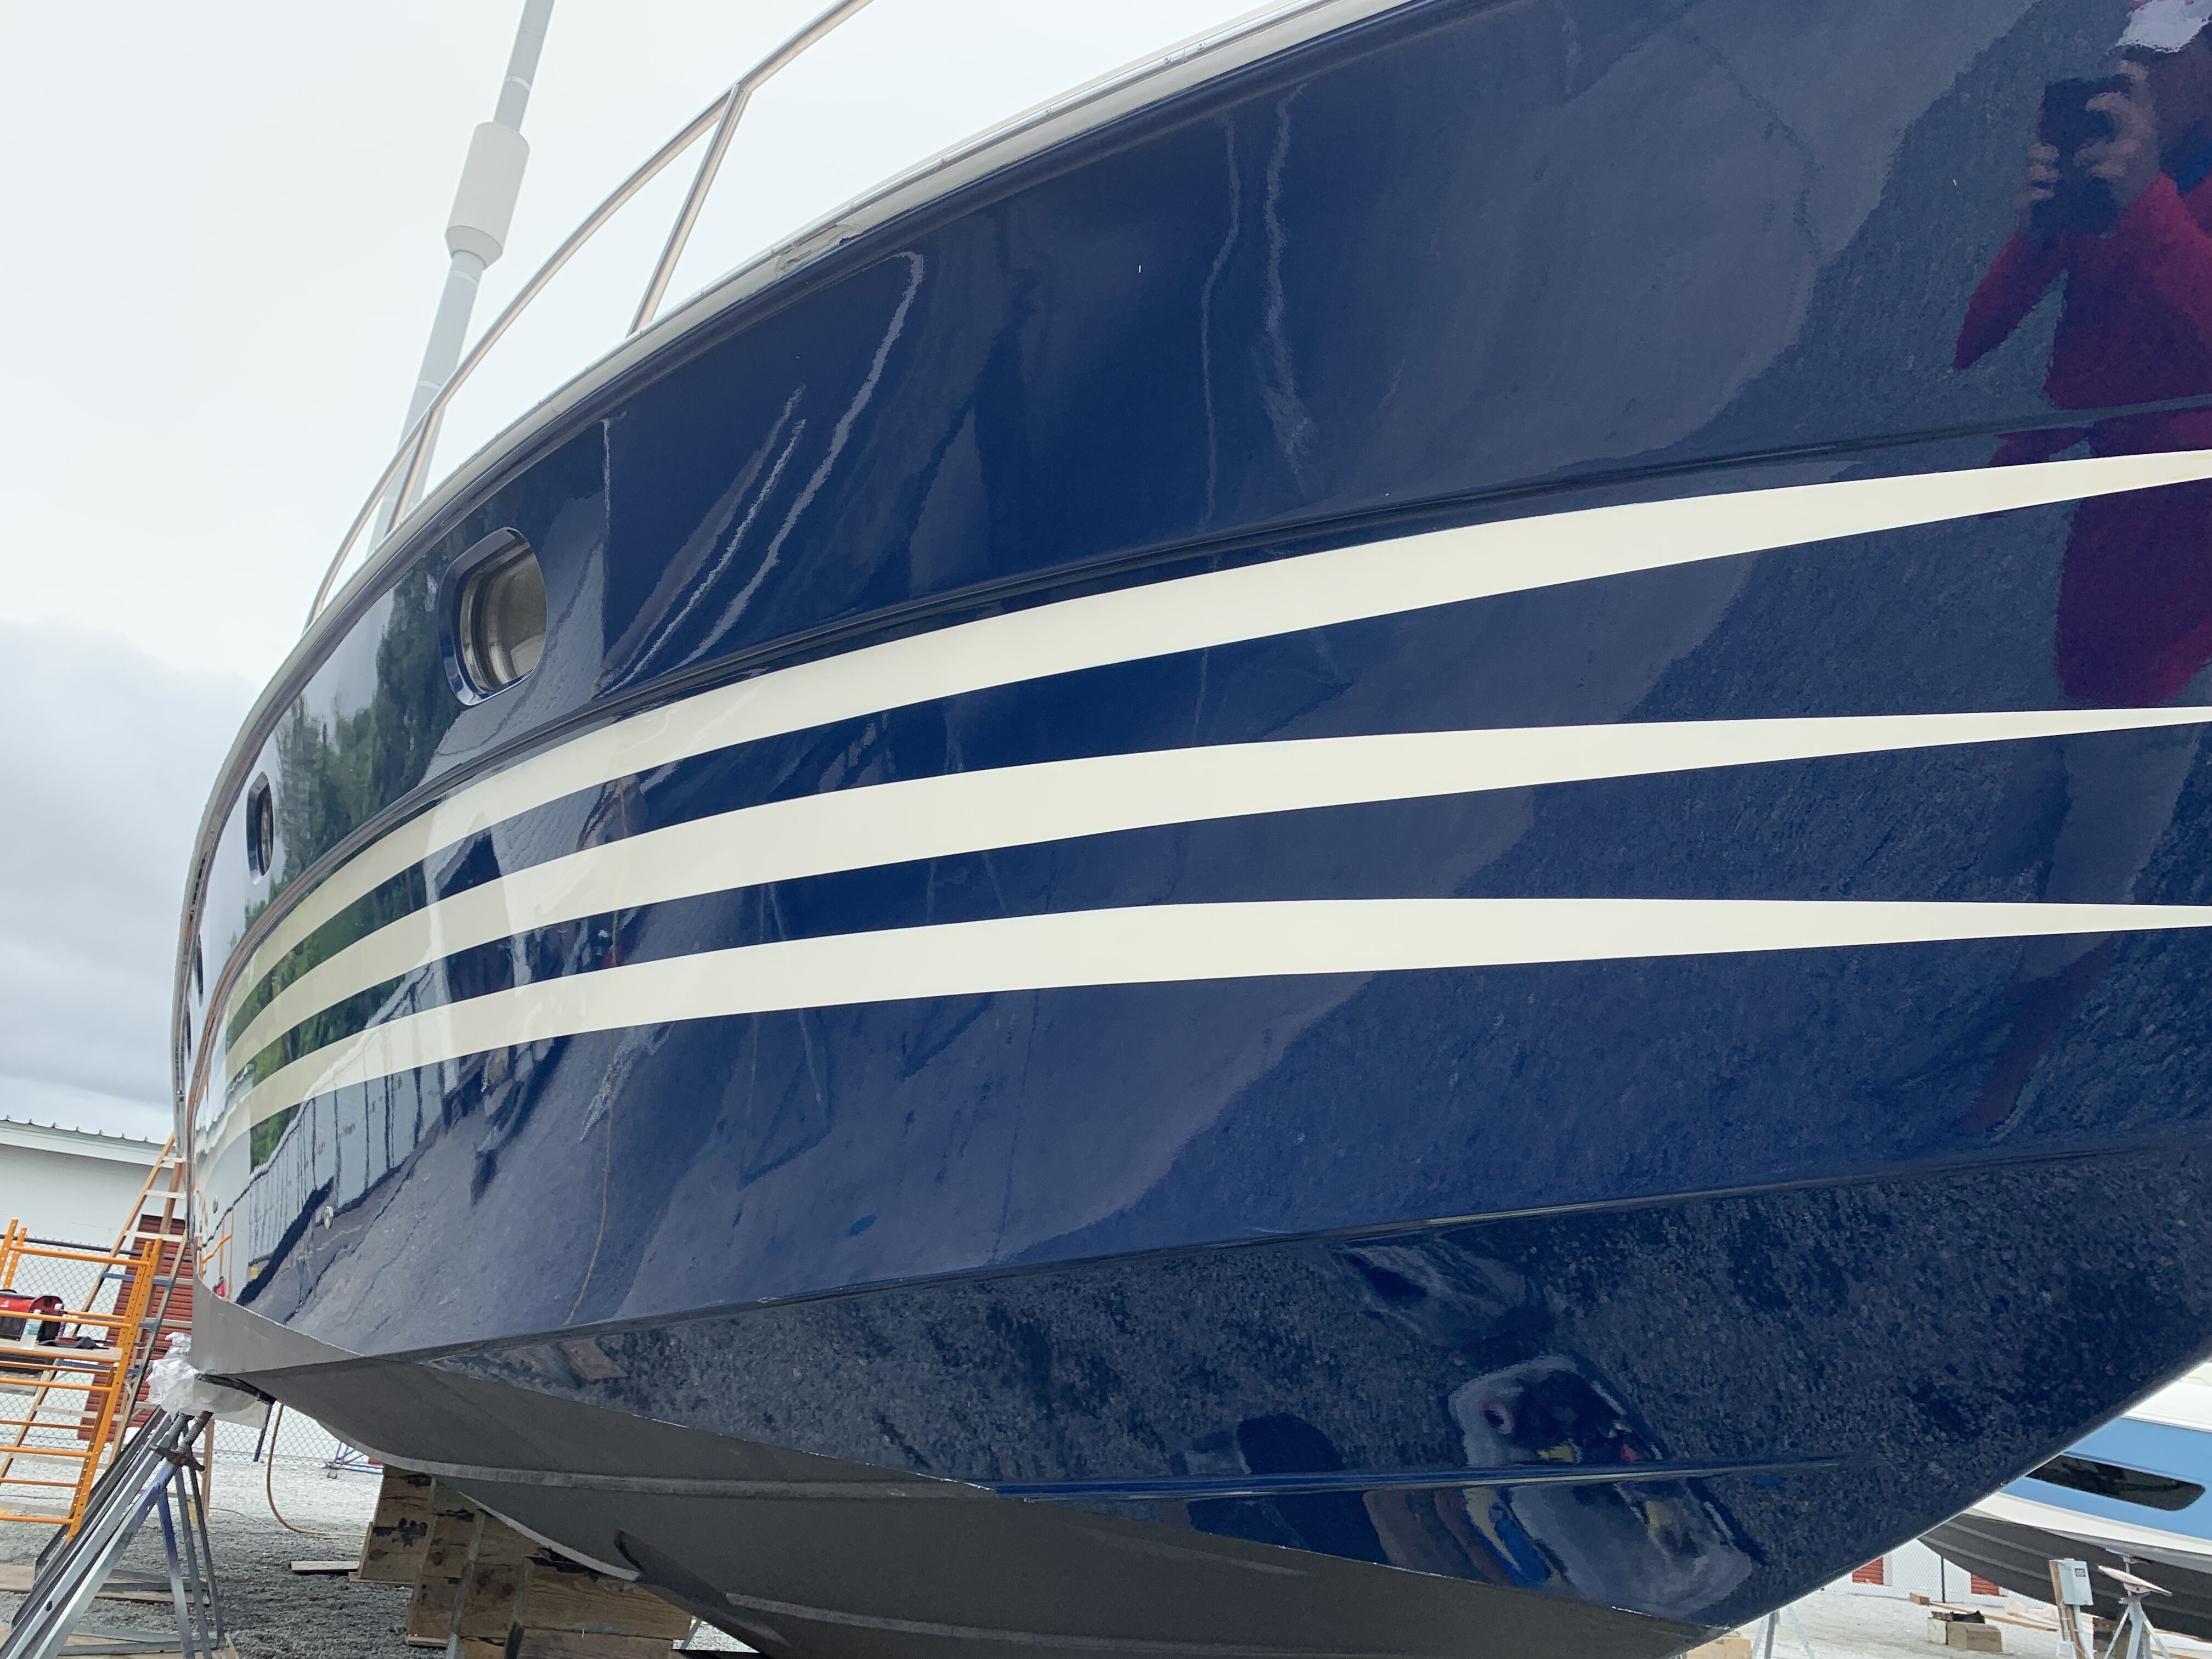
James recently purchased this pre-owned 2007 48' Baia boat to be used for his charter business in the Cayman Islands. After having previous experience with the Glidecoat ceramic coating, he wanted his newest purchase to be protected before the boat left for the islands.
Considering the boat was located here in Florida, James elected to hire our service team to complete the ceramic coating application.
Ceramic coatings are becoming more and more popular in the marine industry as it is more widely known within the automotive space. What has been challenging for boat owners, detailers, yards, etc. is understanding the proper marine ceramic coating process.
In this case study, we will walk through the step-by-step marine ceramic coating process that was completed on the 48' Baia and provide you with the knowledge on how to complete your own boat or on a client's boat.
- Boat Brand:
- Baia
- Length Overall:
- 48'
- Ceramic Coating To:
- Hull and Transom
- Completion Time:
- 29 hours
- Location:
- Fort Myers, FL
One of the most challenging aspects of a marine ceramic coating application is understanding the best steps to achieve optimal results on each particular boat. Unfortunately, each boat is different and you must be prepared to customize your strategy to conditions of the boat.
Our marine ceramic coating process includes;
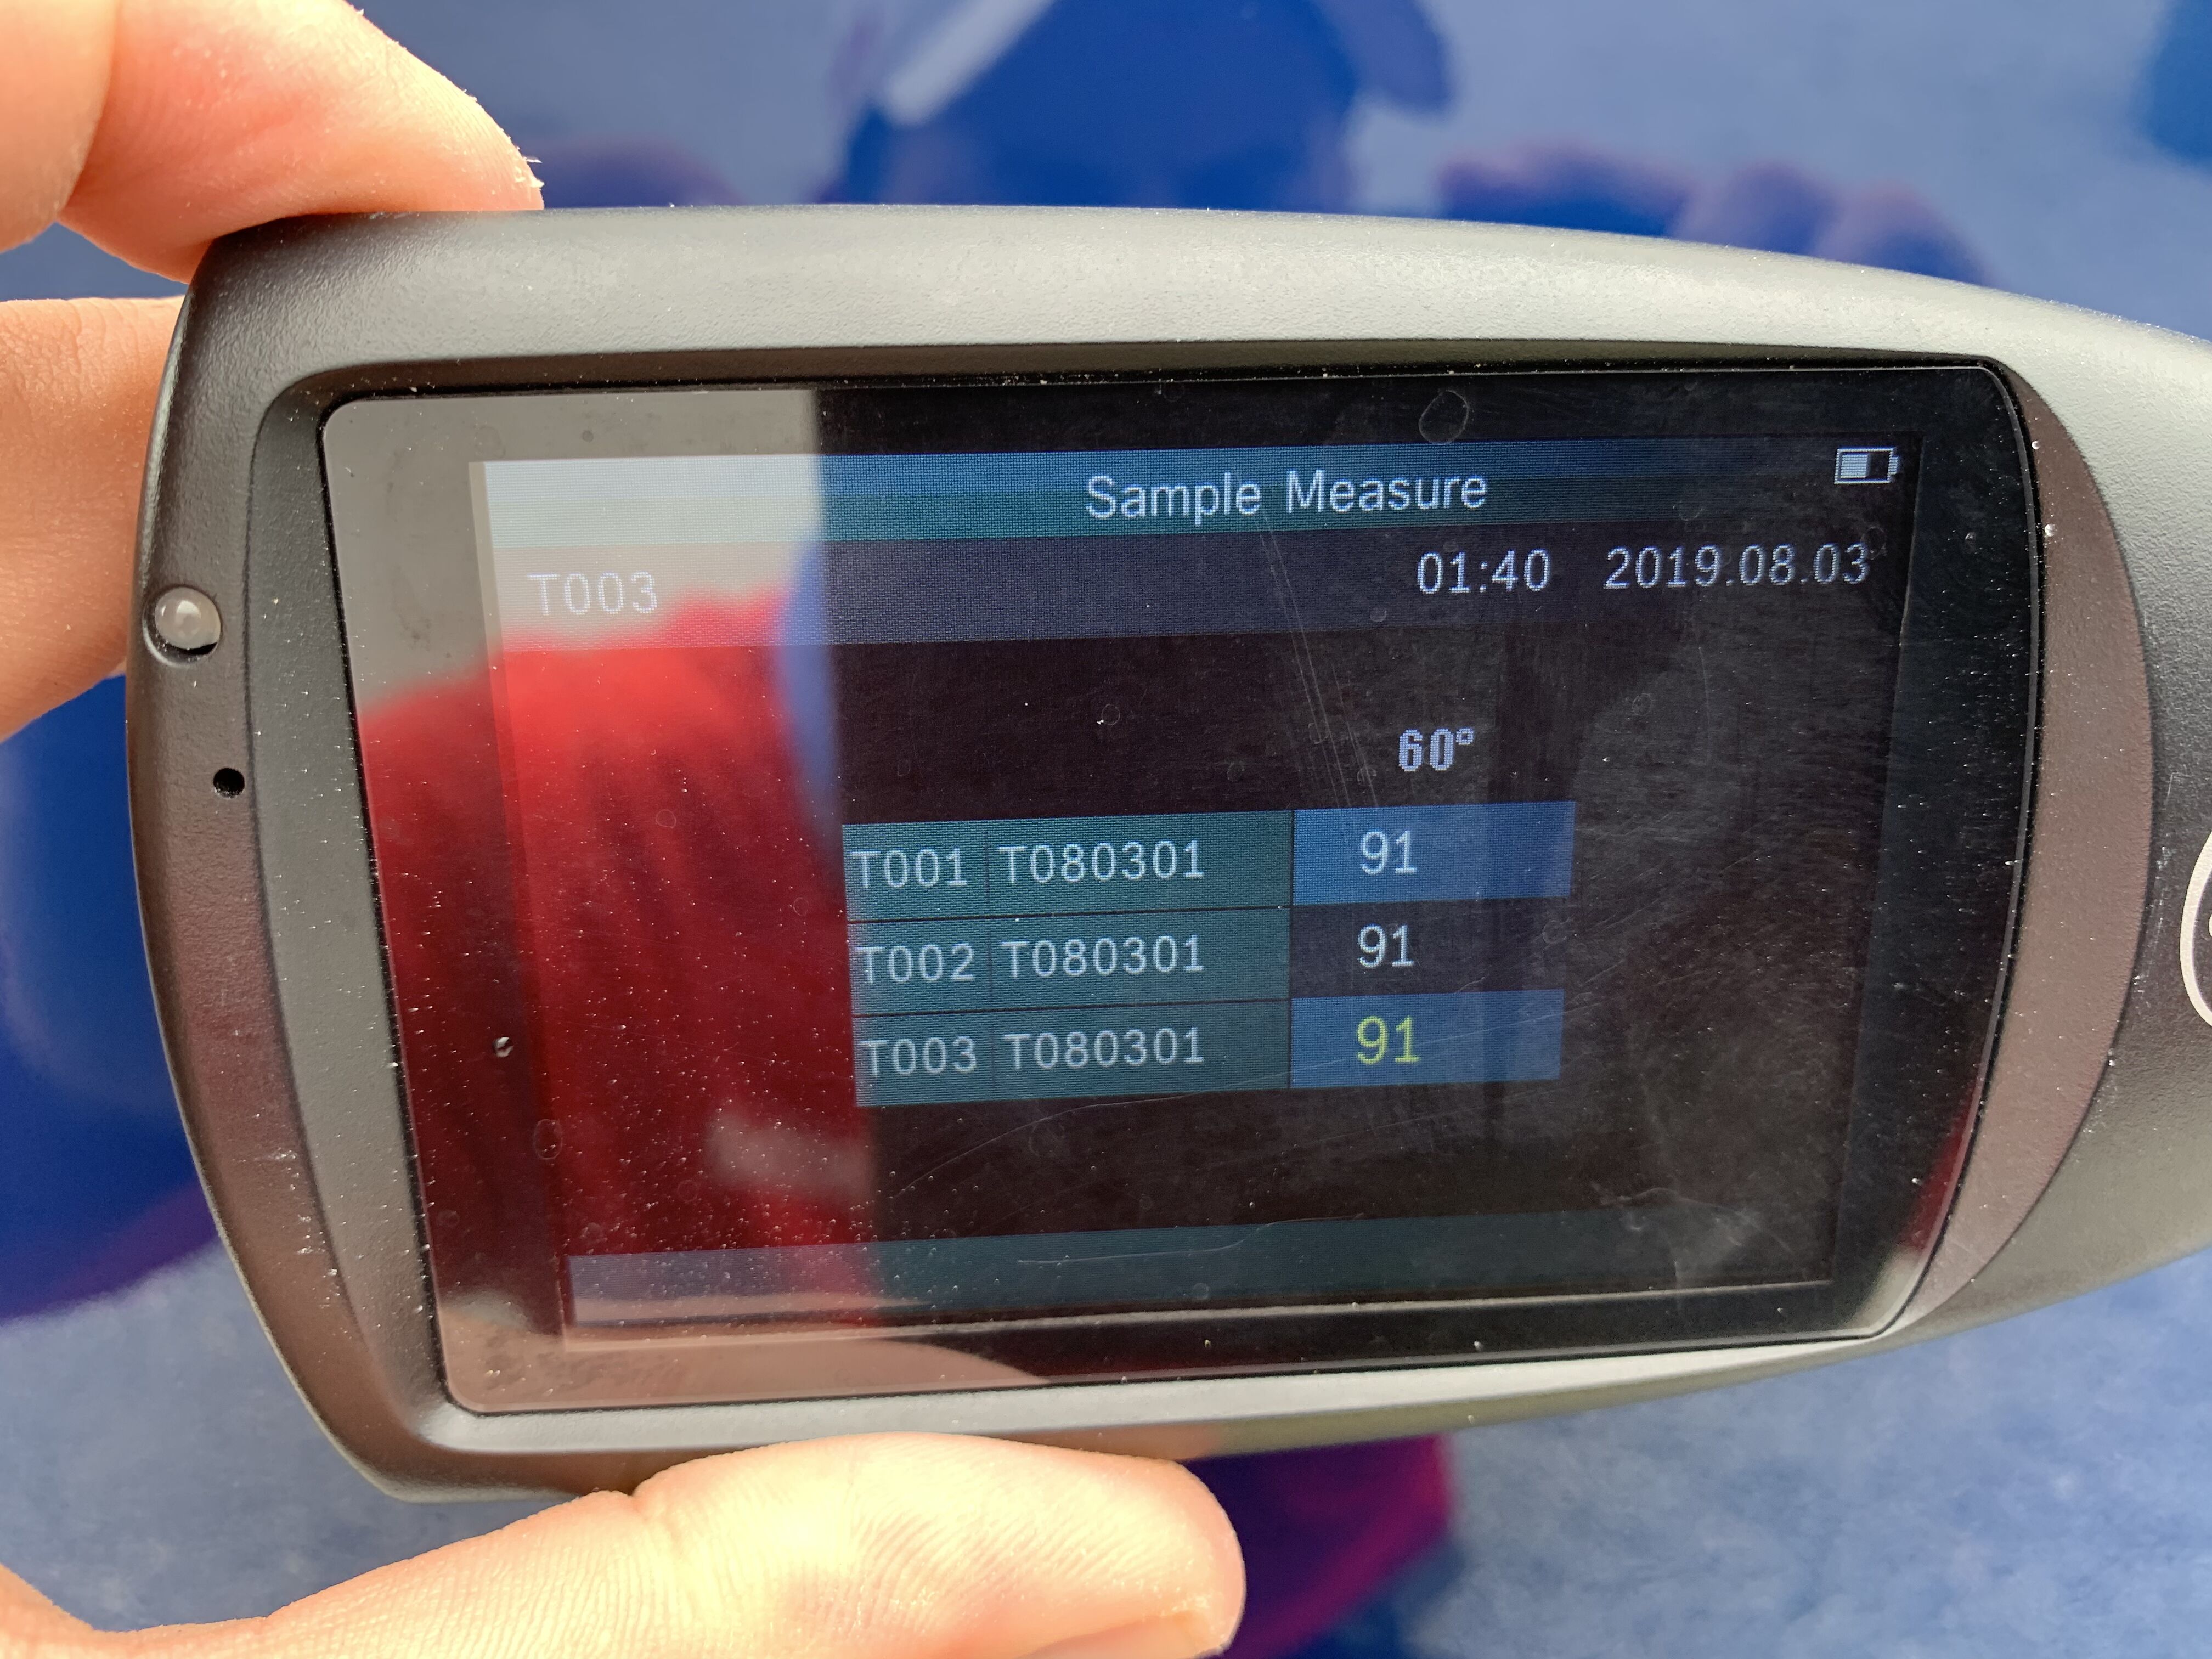
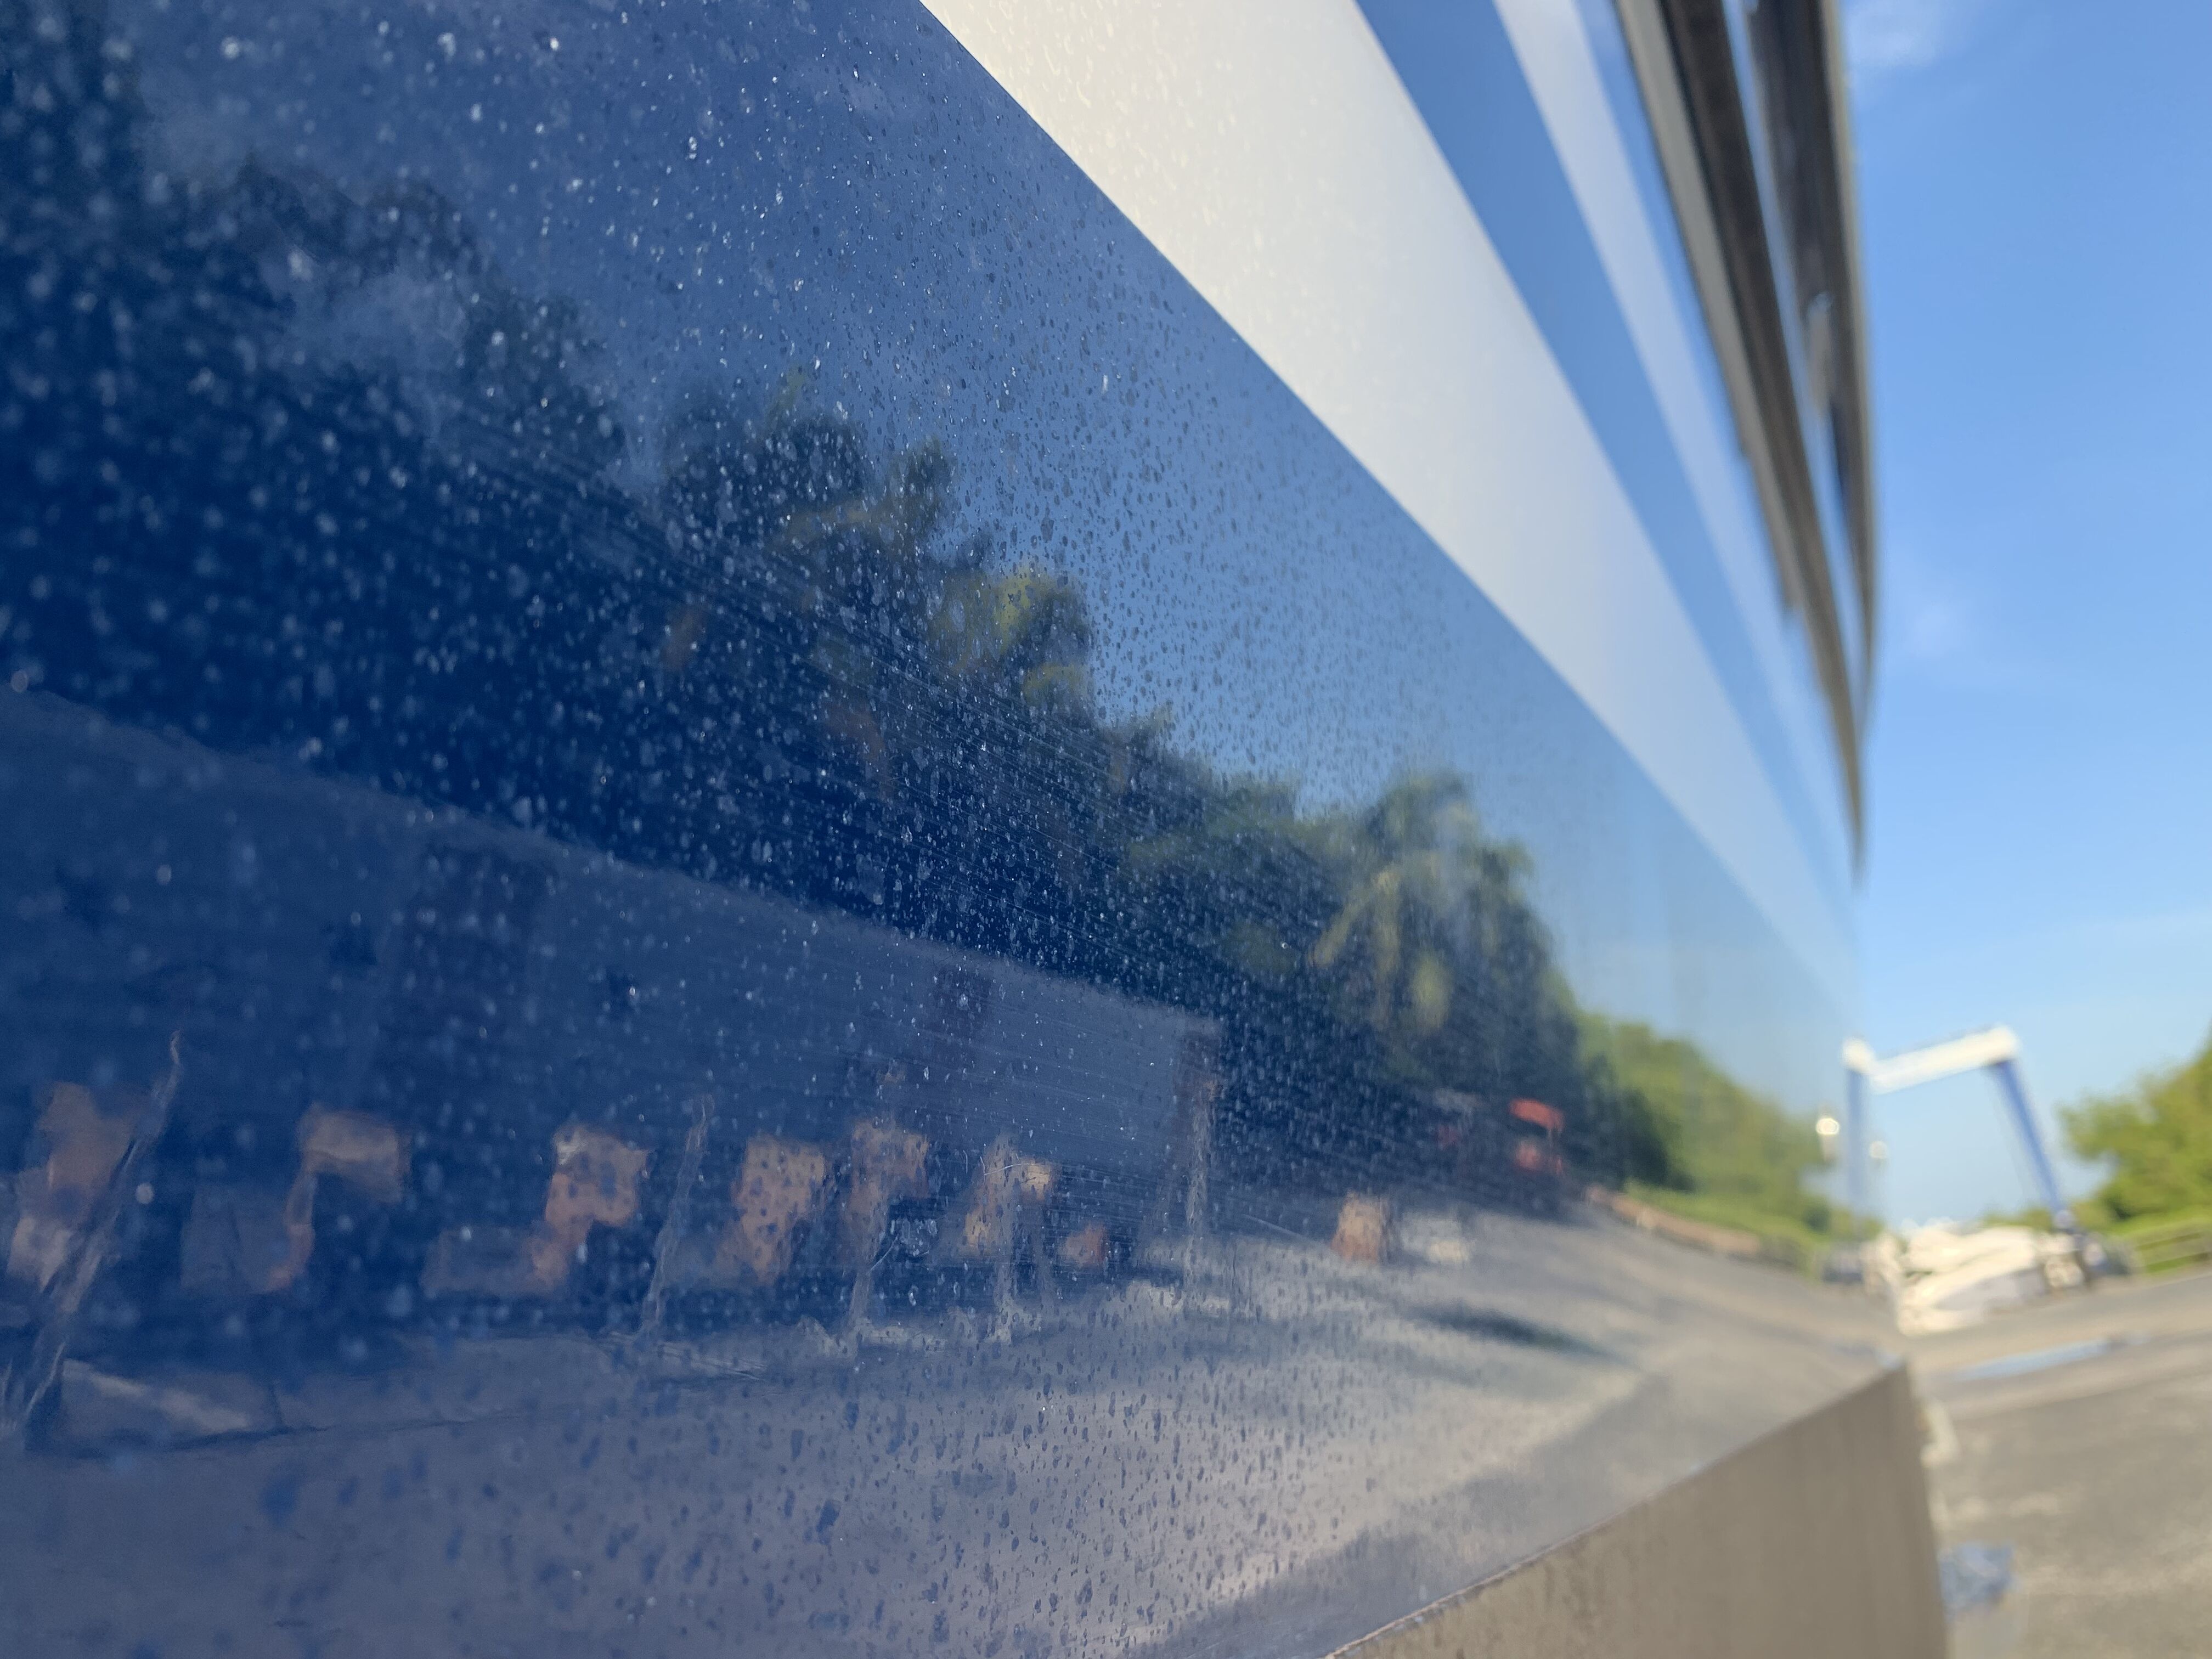
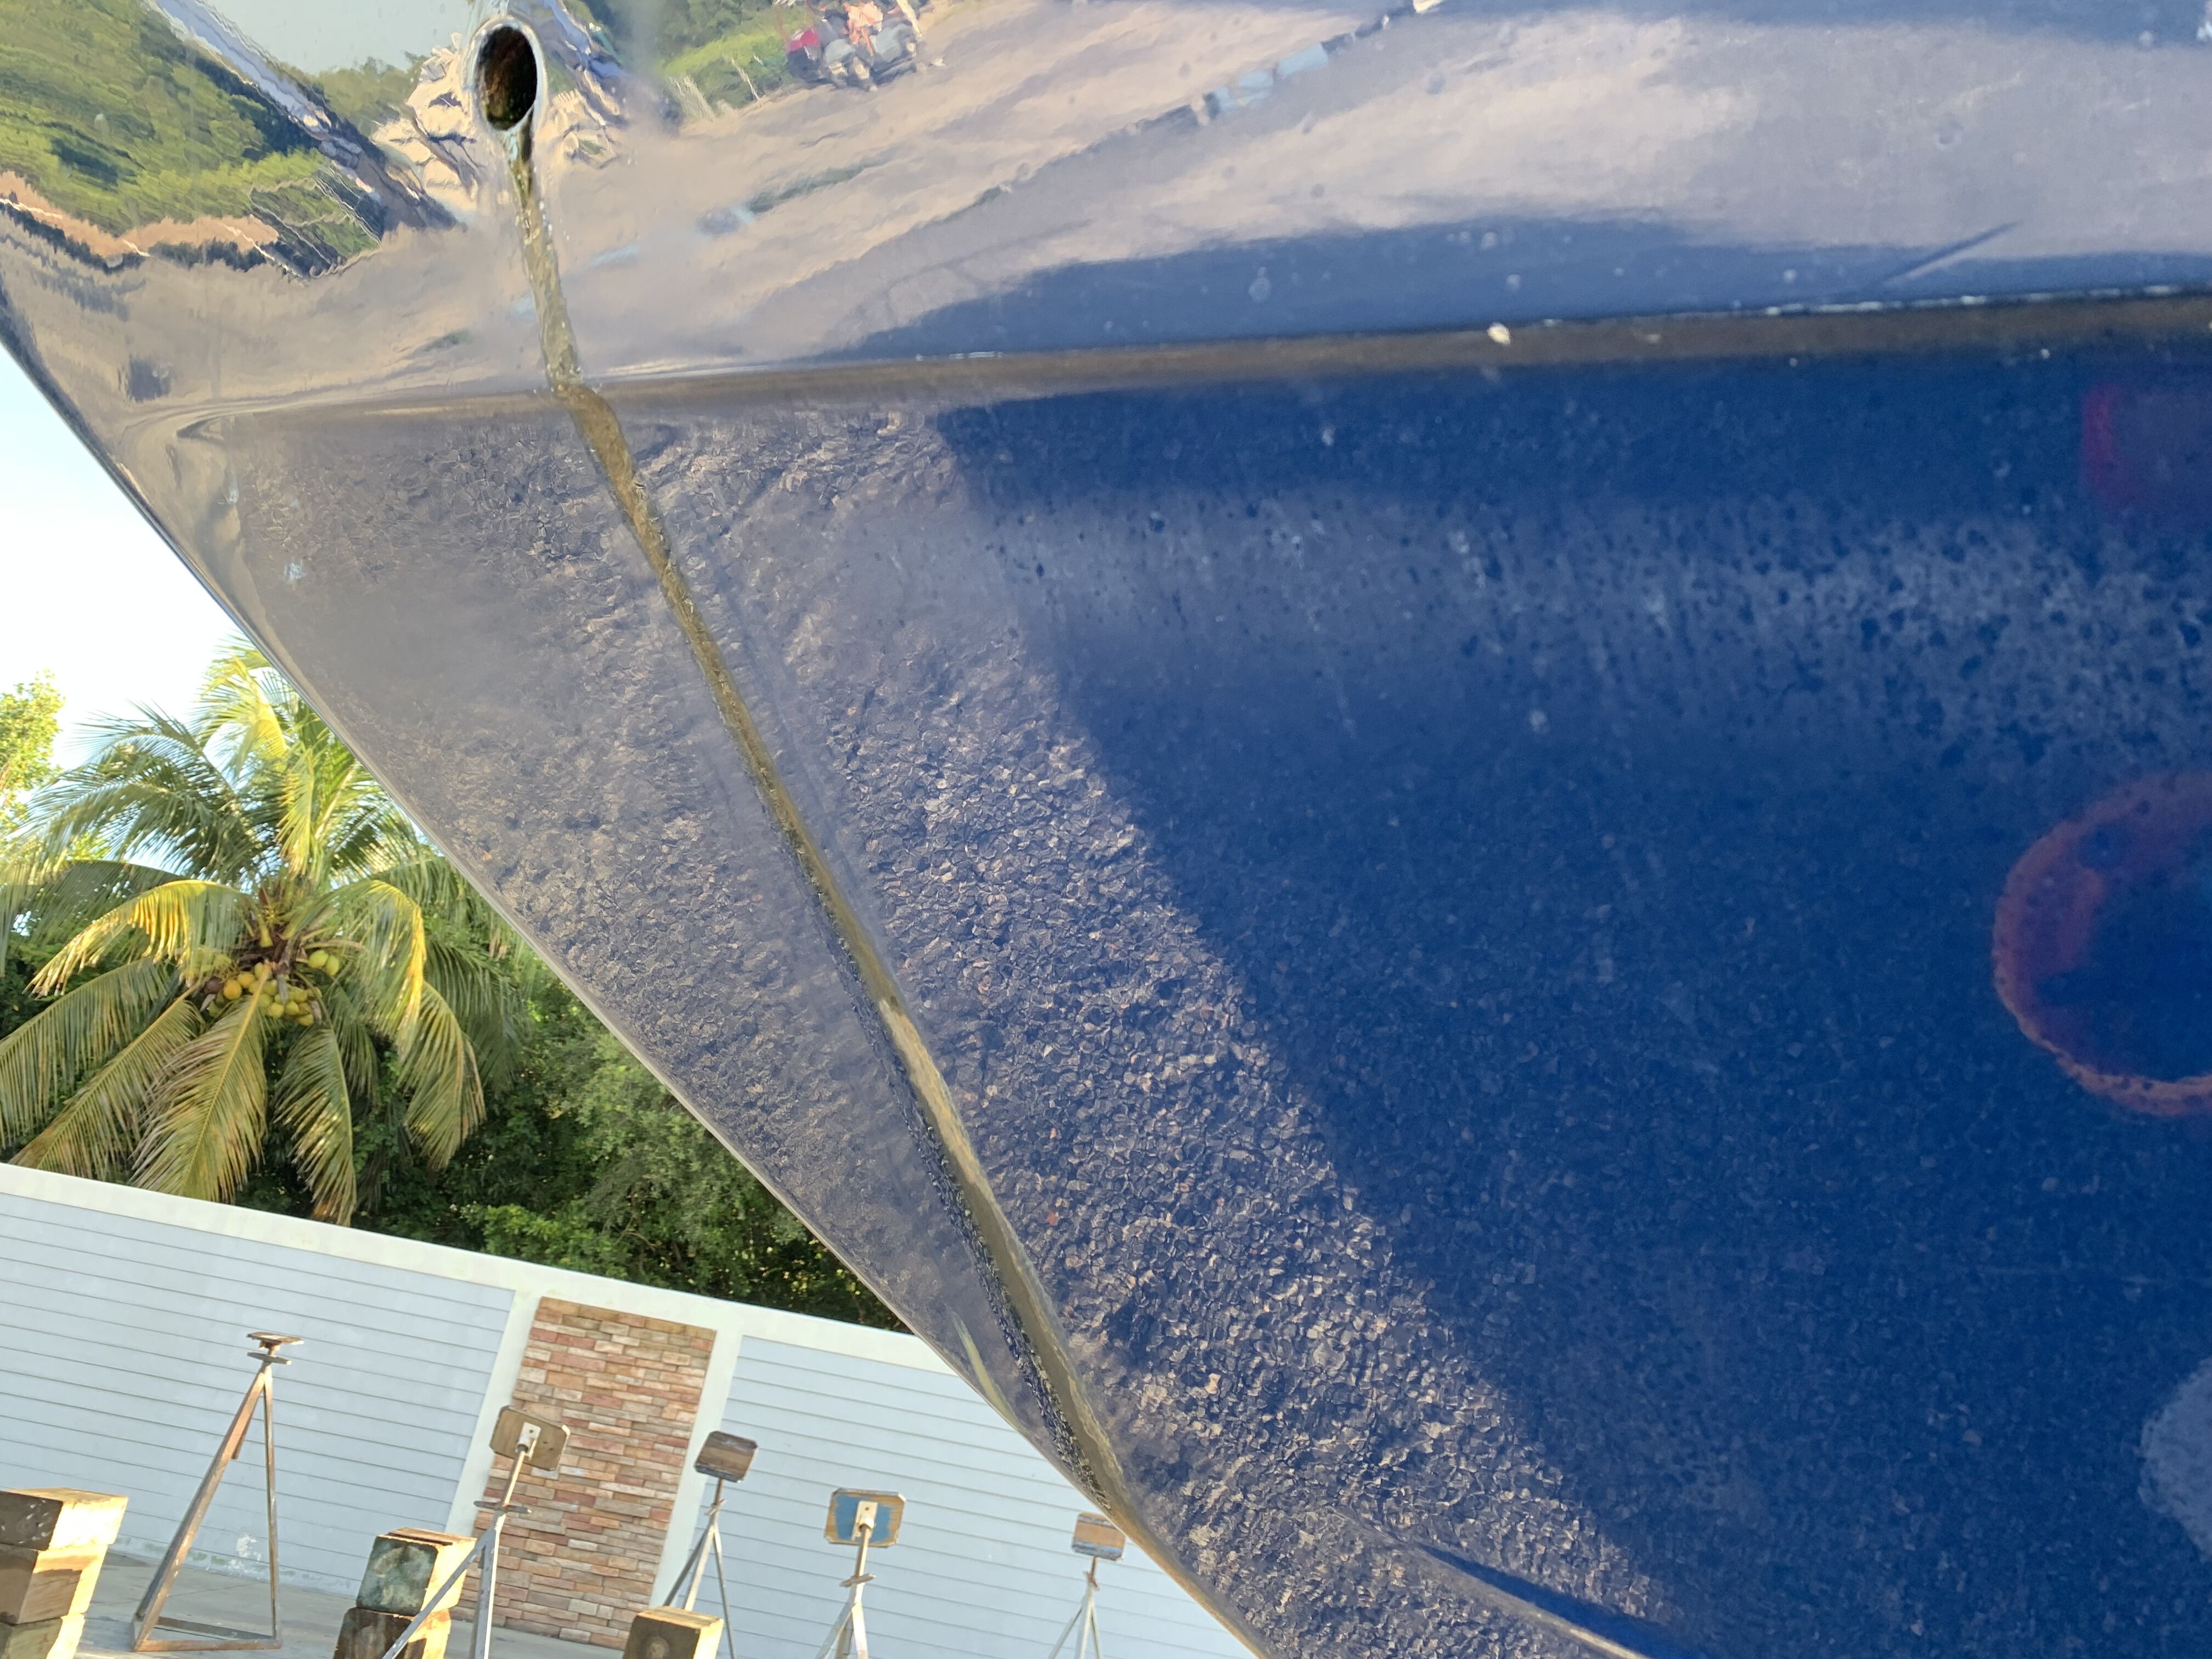
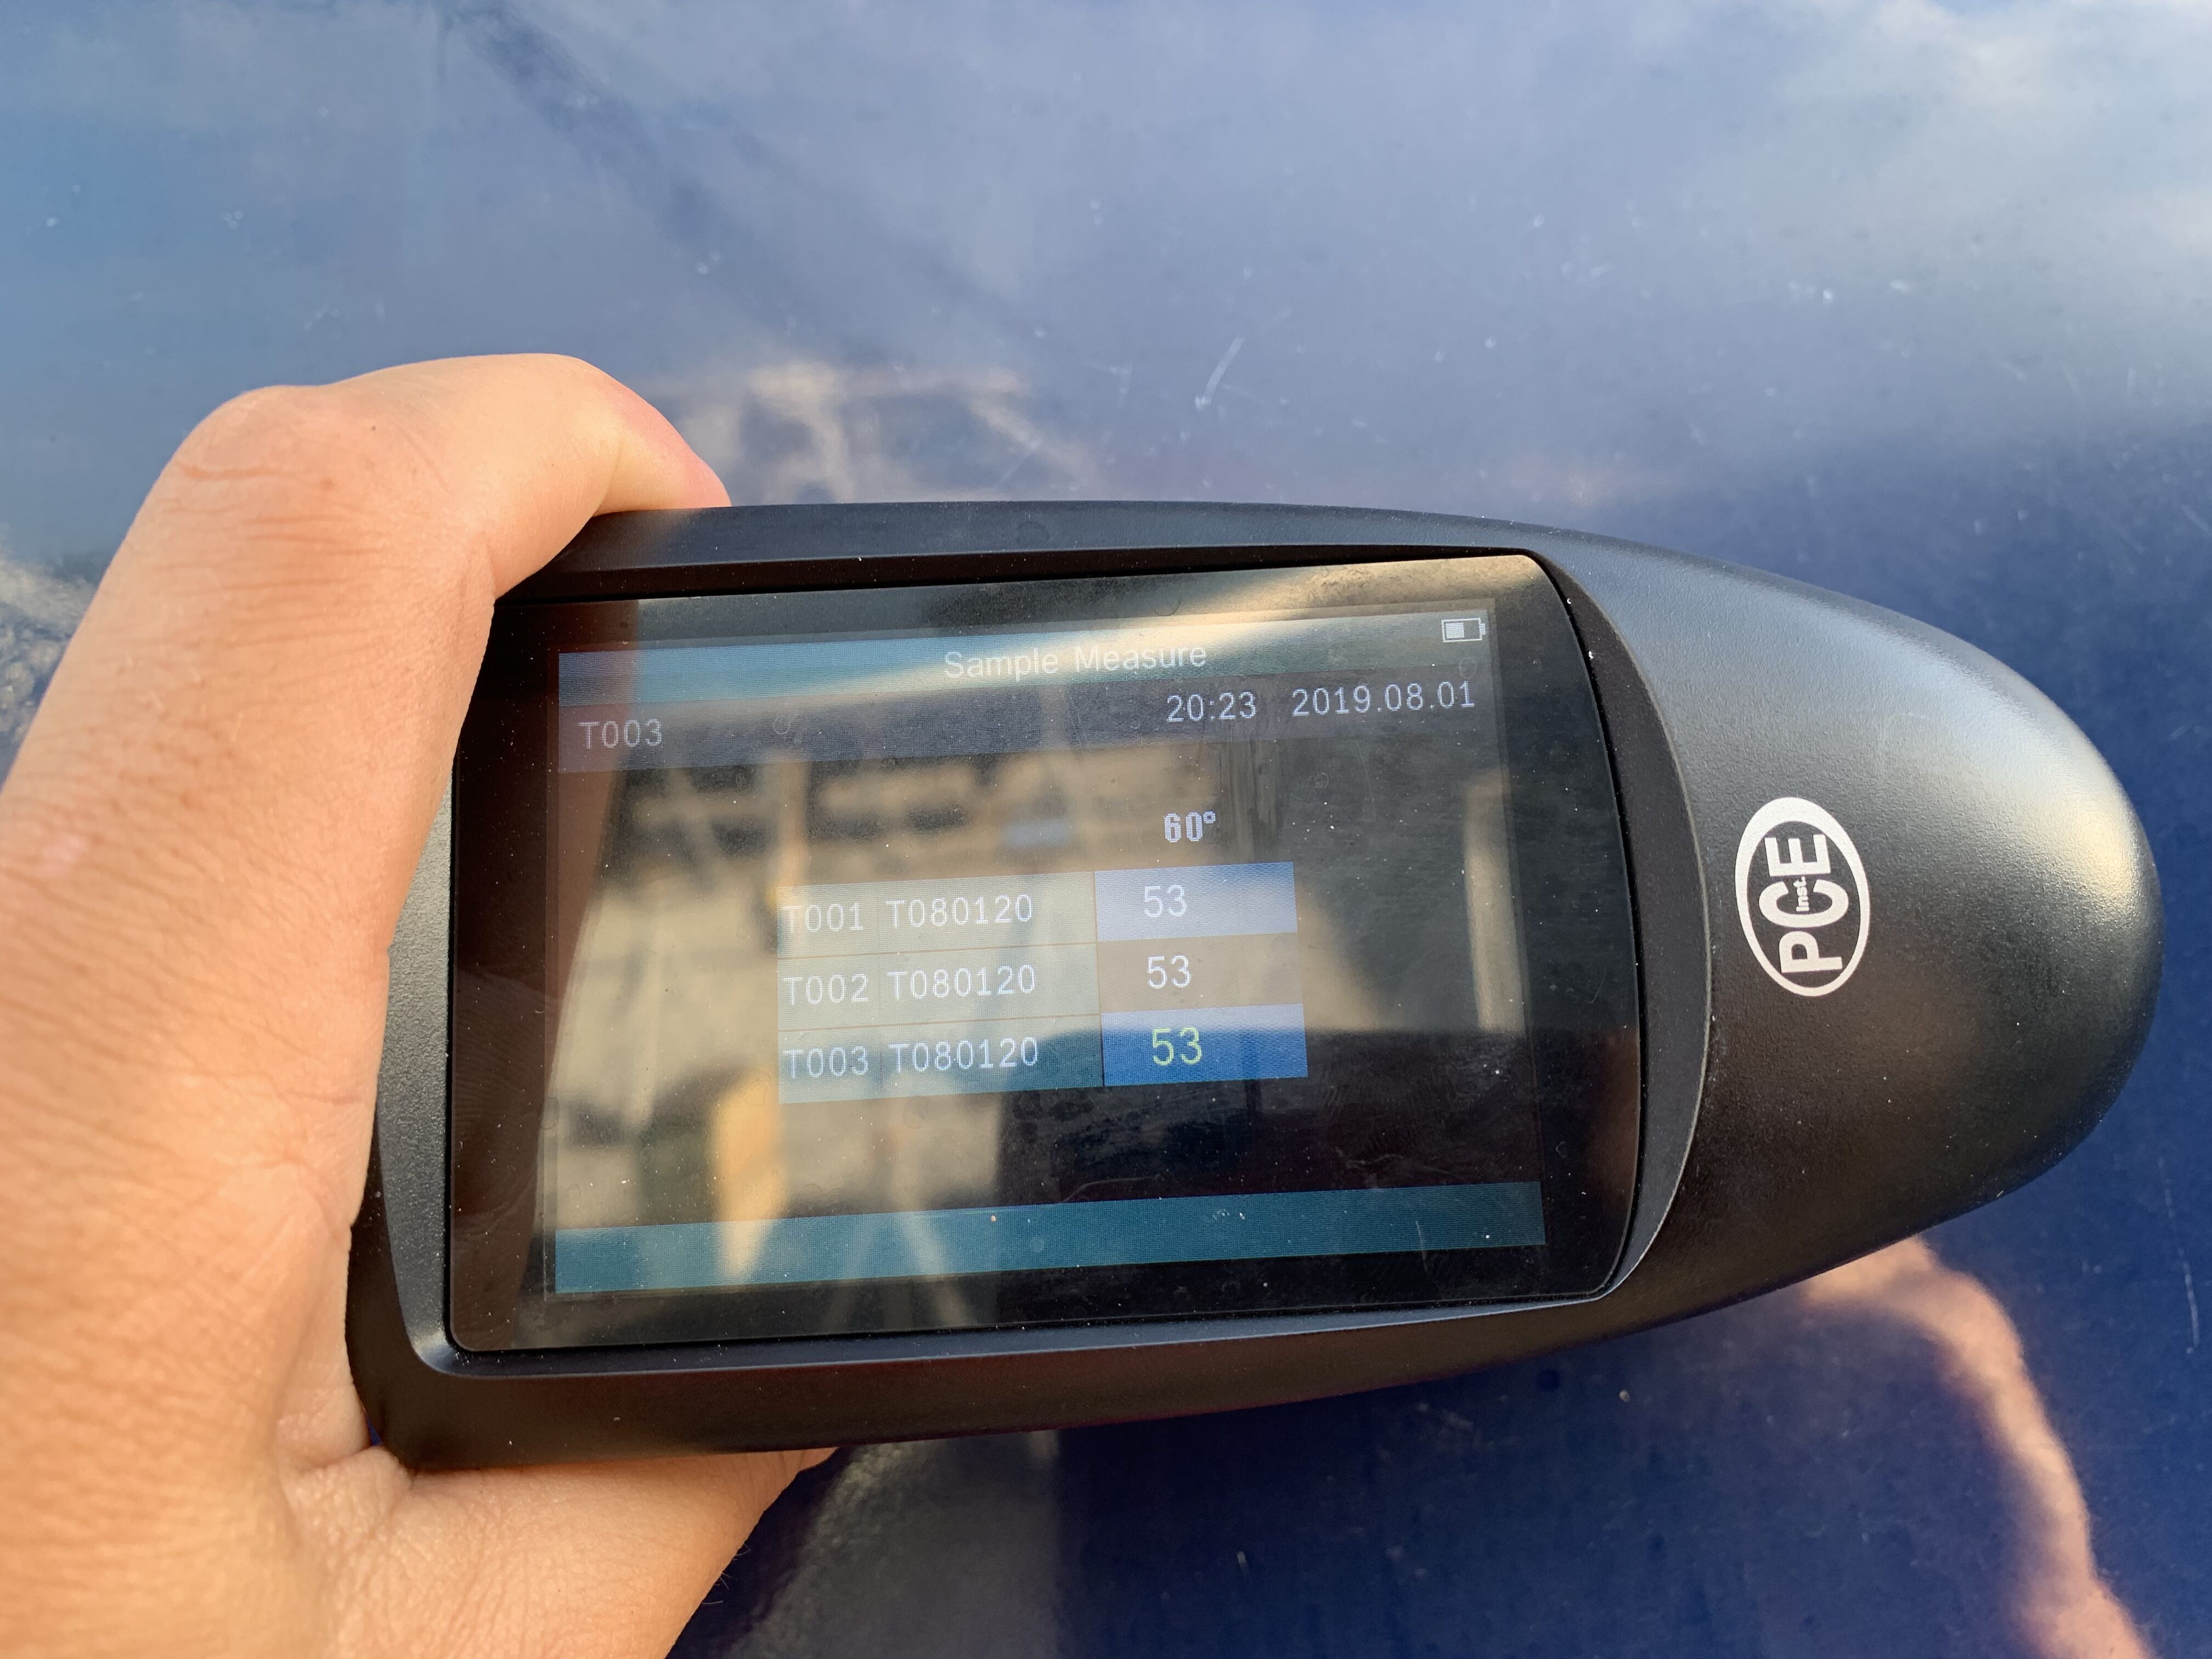
1). Take before photos once arriving at the boat with gloss meter readings to provide us with a sense on the condition of the surface (see photos below)
2). Wash the boat to see the condition of the surface
3). Complete several test spots across the boat to determine the appropriate course of action
4). After the necessary prep of the surface, apply Surface Wipe to remove any decontaminates from the surface
5). Apply at least two coats of ceramic coating to the surface
Note - We recommend applying a third coat to the highly sun exposed areas.
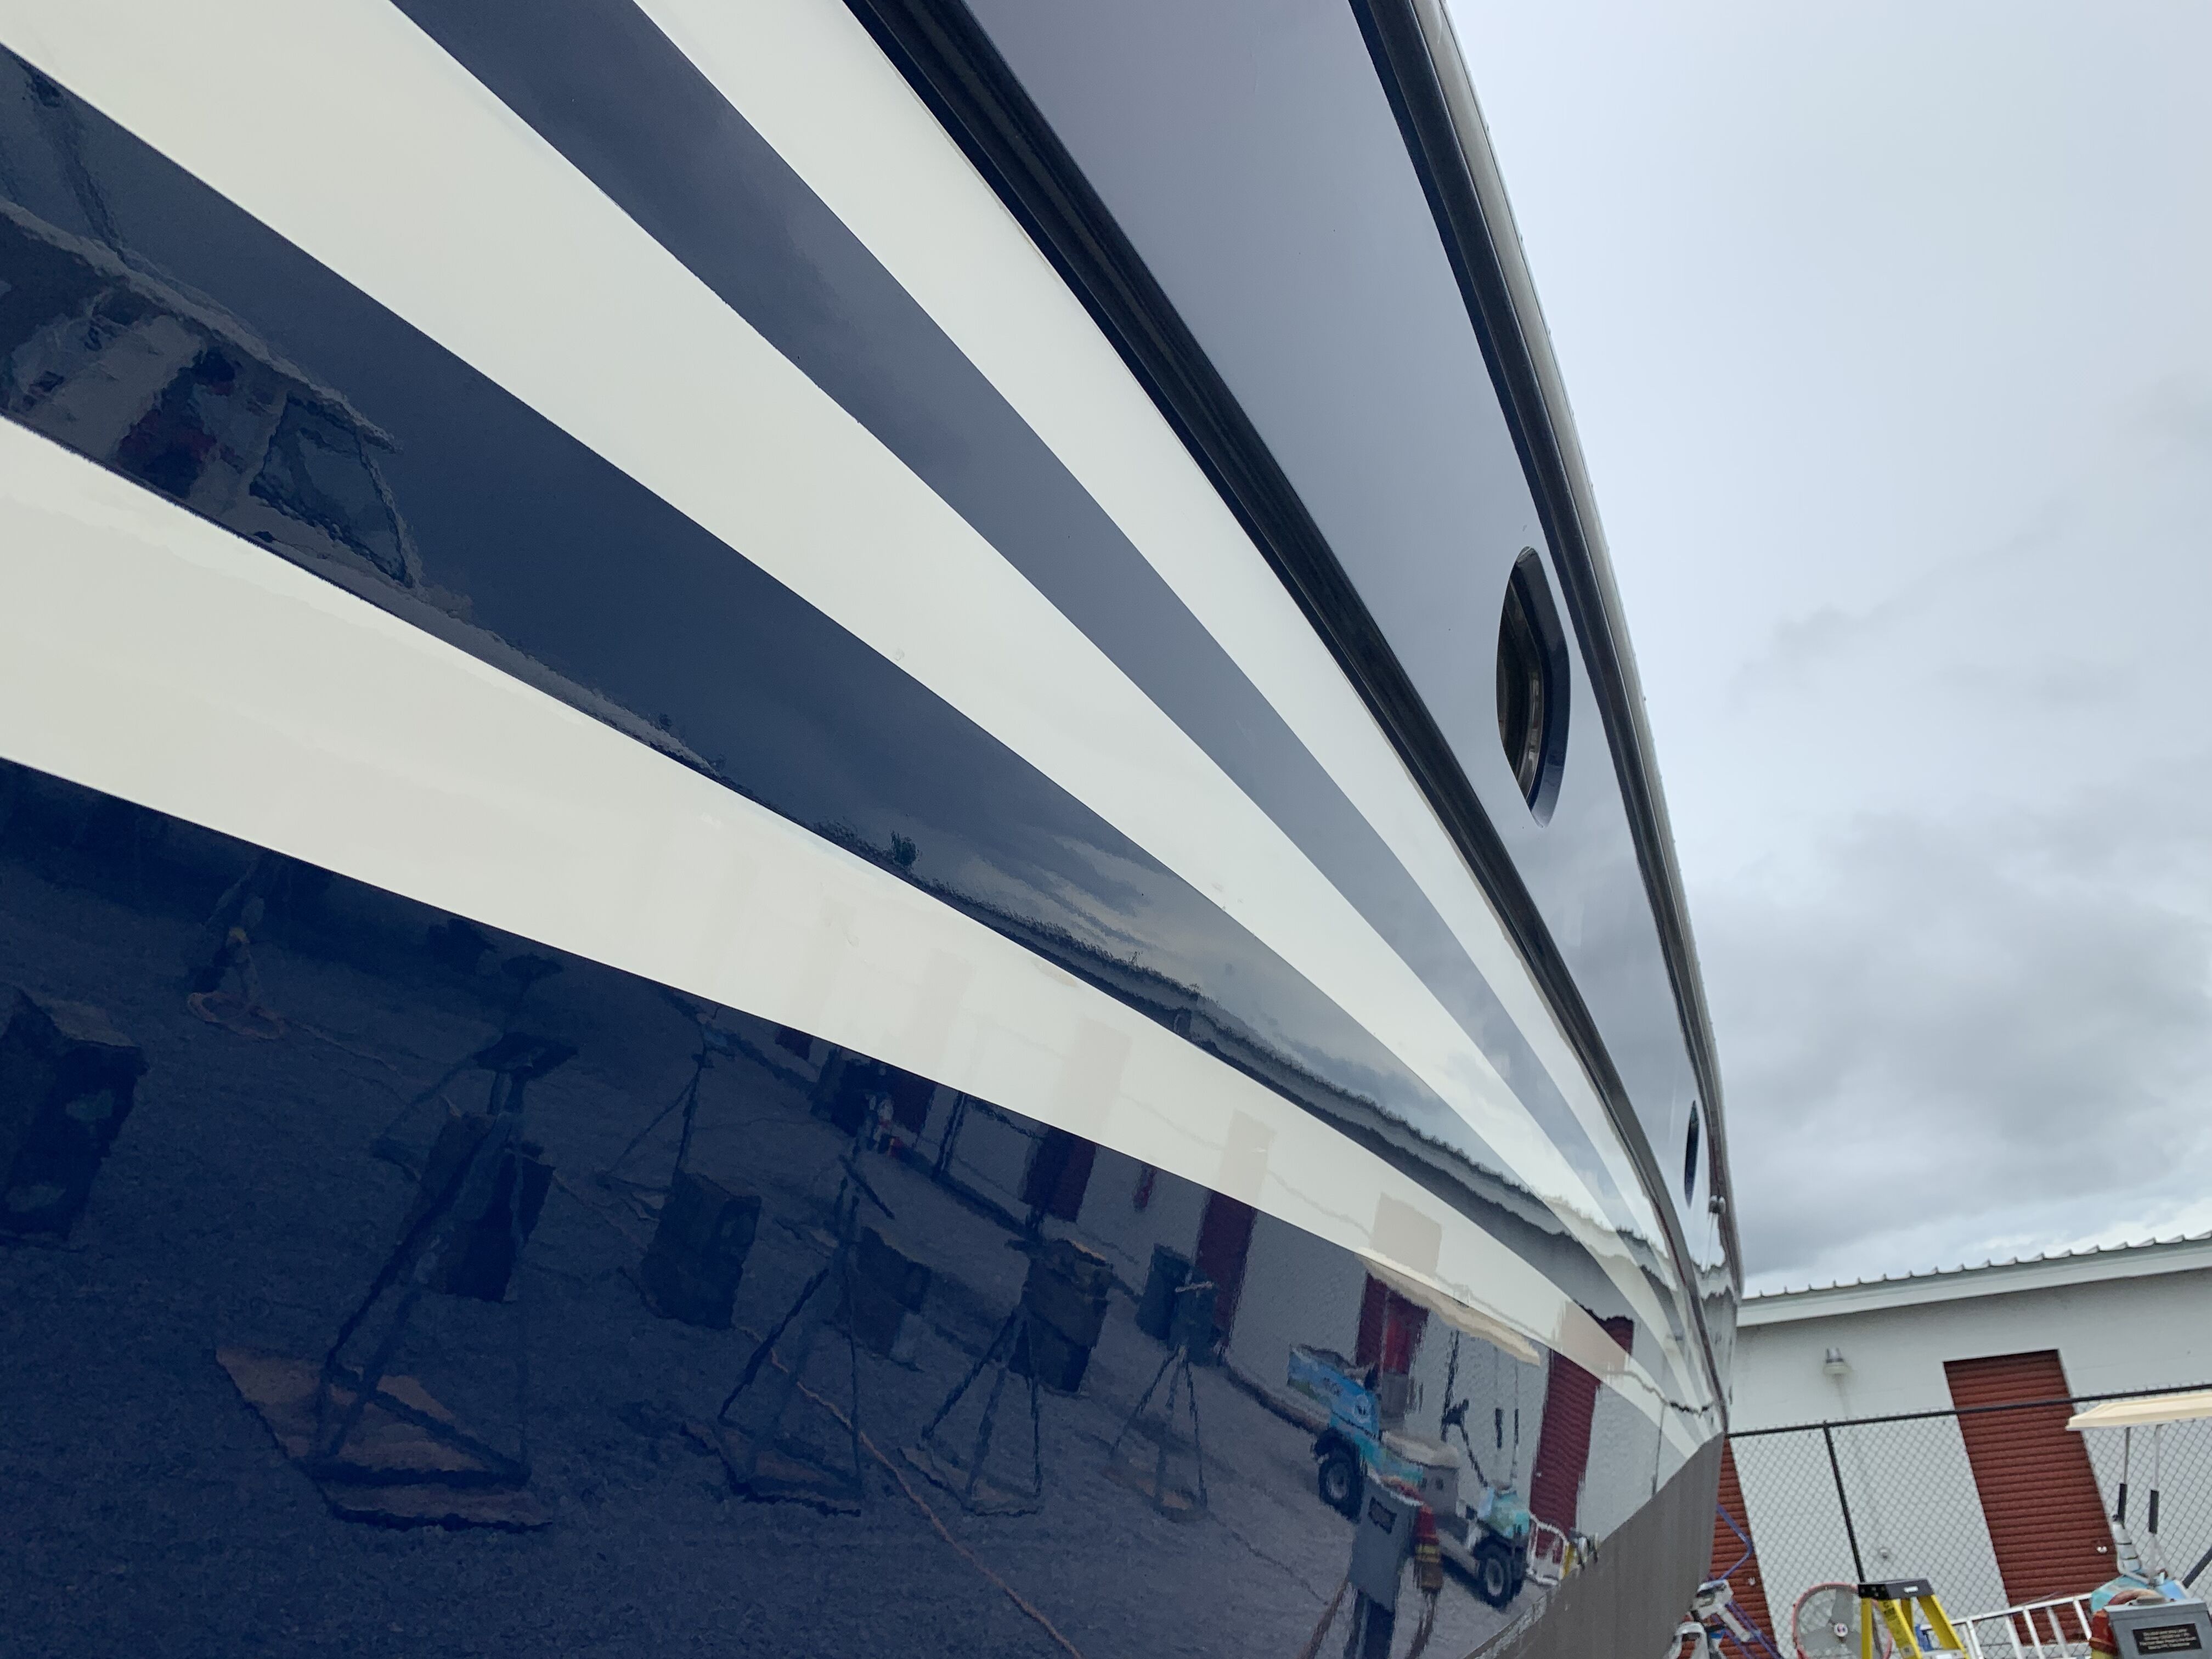
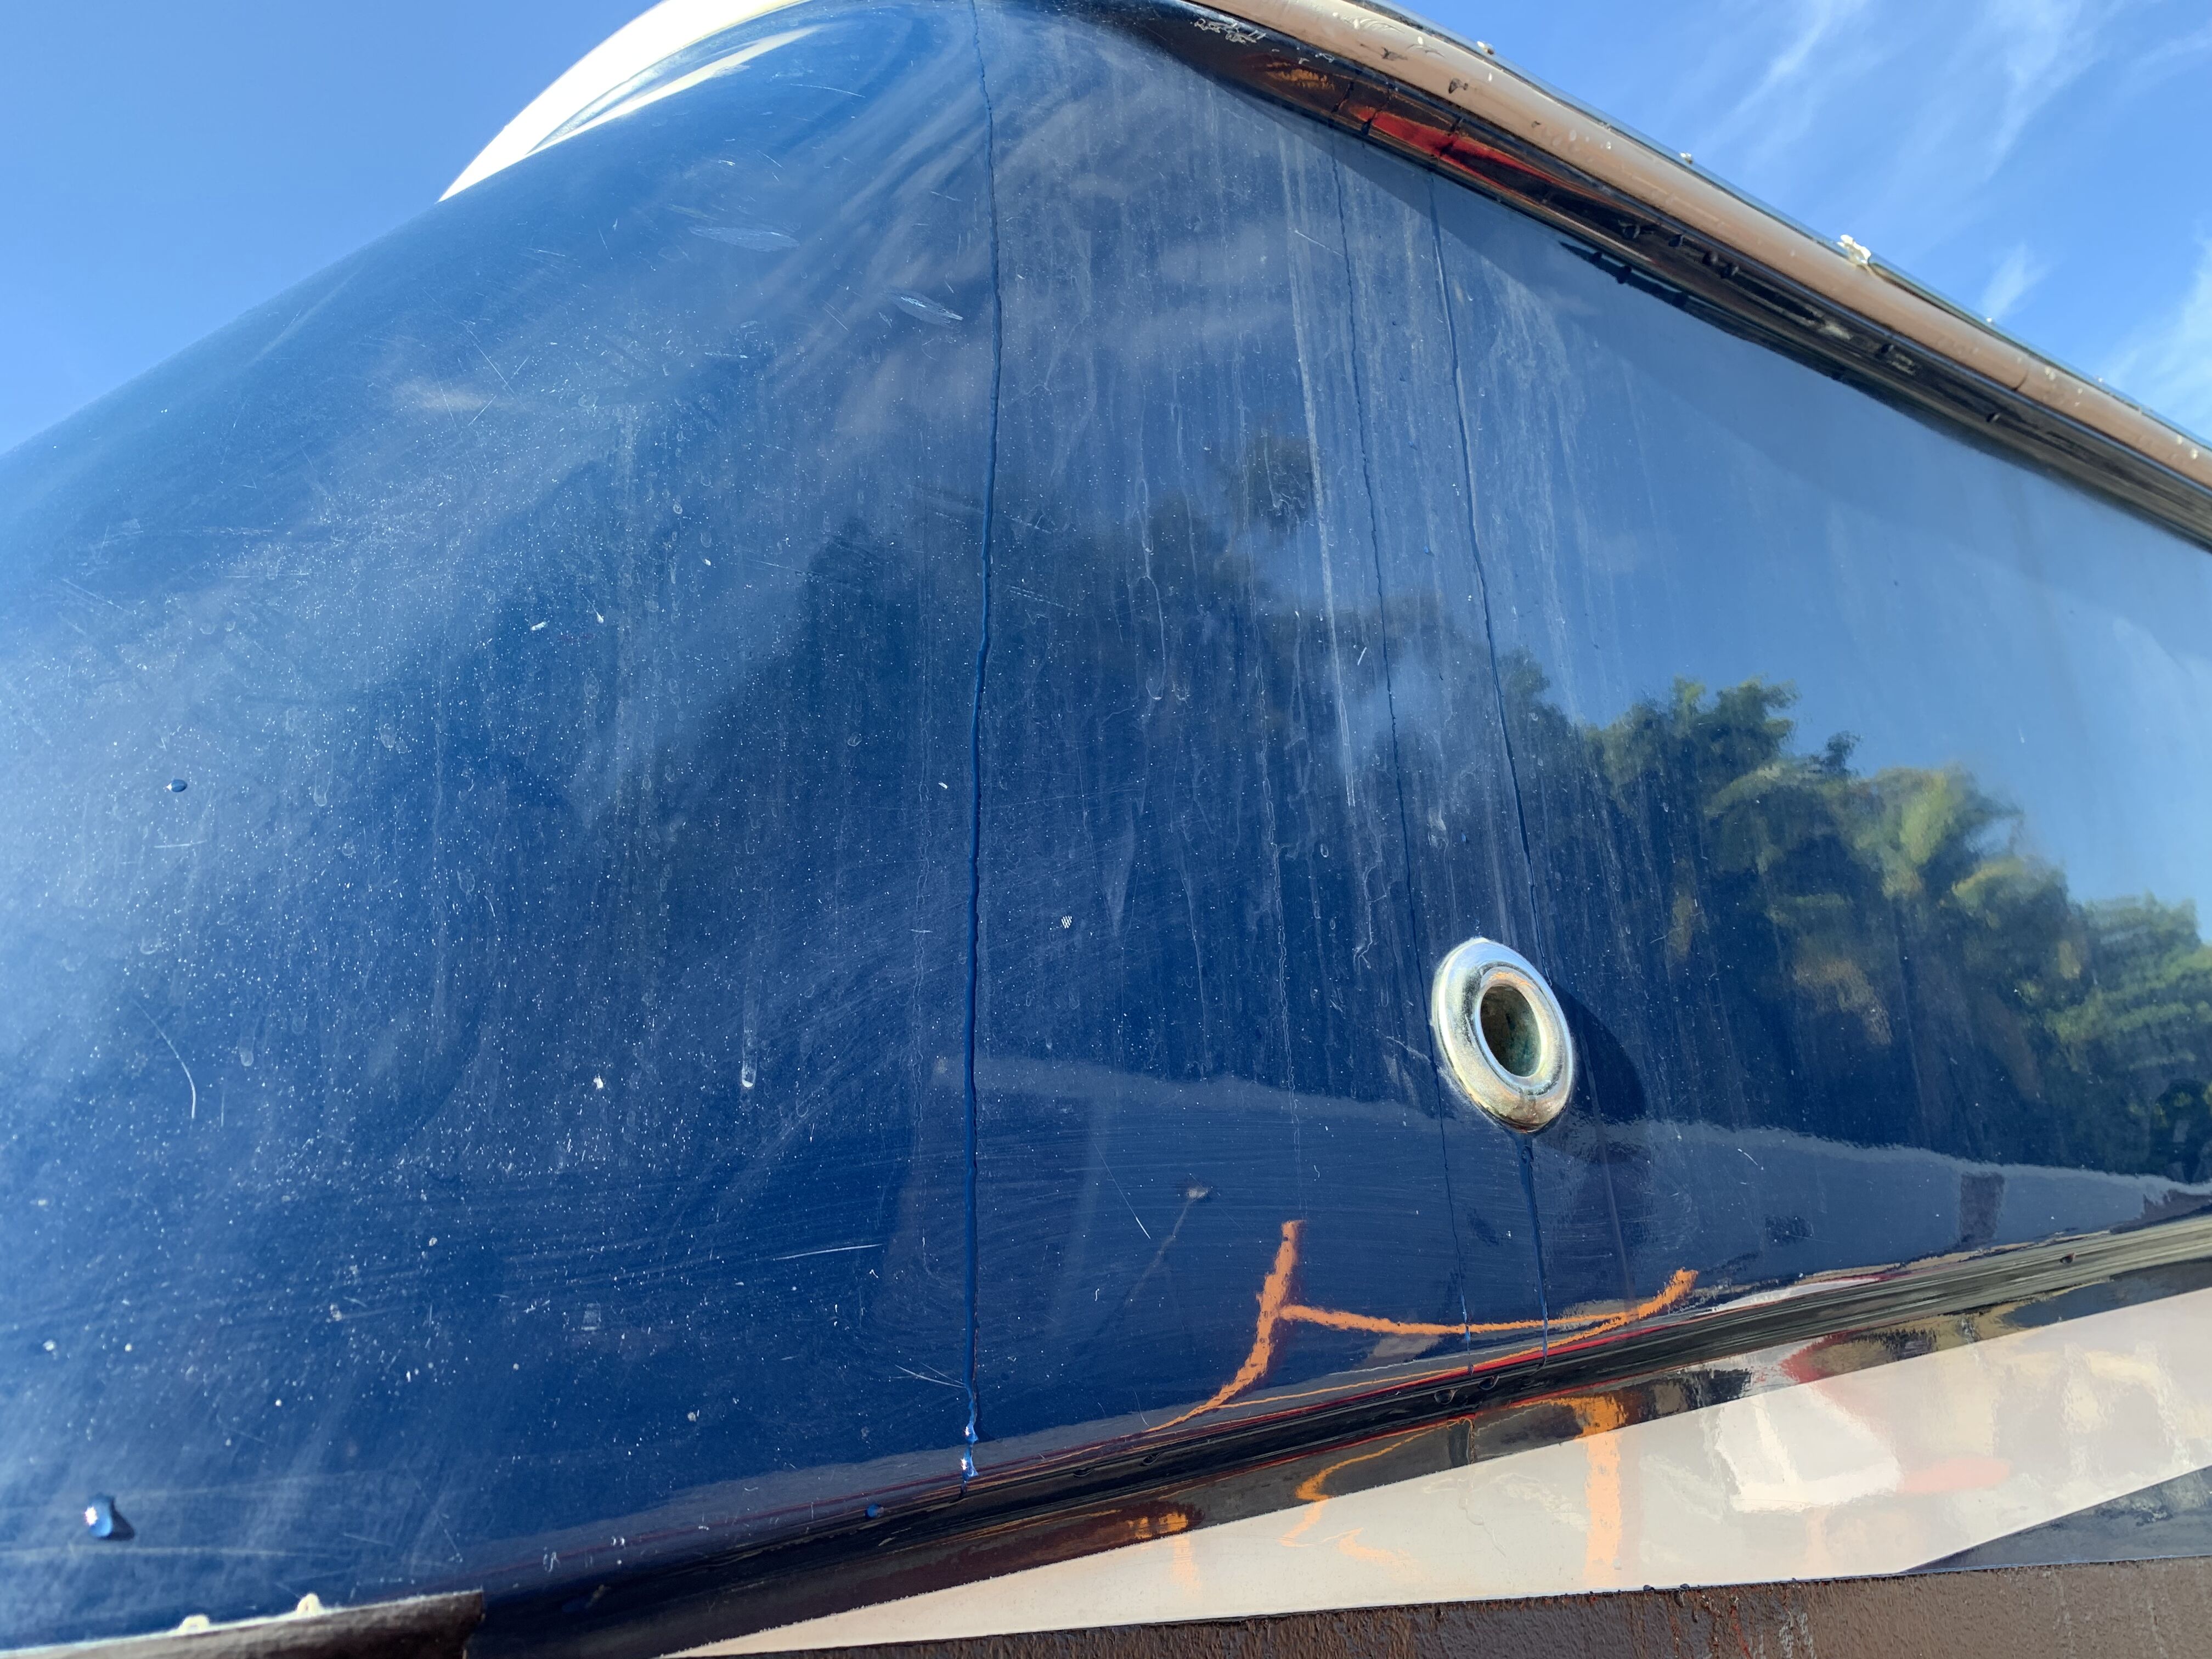
This 2007 48' Baia presented a number of unique challenges the marine ceramic coating process as the previous owner had neglected any protection to hull. As shown in the photos below, the hull was covered in salt, streaks down the hull and even etching from continual water.
Marine Ceramic Coating Process
To be successful with a marine ceramic coating process, the prep work is vital. Typically, older colored boats are the most challenging to work with to bring back to life. For this particular project, we completed a 7 step process to properly apply our marine grade ceramic coating.
1). Wipe down the hull with CLR to remove the salt build up on the surface
2). Complete rinse, wash and use of soft foam brush to remove any remaining CLR and other contaminants on the hull
3). One buffing step with medium grade compound and a medium grade foam pad
4). One buffing step with polish and soft foam pad
5). Sterilize the hull with Surface Wipe
6). Apply two coats of marine ceramic coating
How To Know When To Apply The Ceramic Coating
A common question from our customers, is how do they know when it is time to apply the ceramic coating. A key piece of information for anyone who is planning to use a marine grade ceramic coating, is that it will lock in the current condition of the surface.
As a result, if you apply a ceramic coating over an oxidized surface, you are essentially locking in that condition. If you have removed oxidization, increased the shine of the surface and removed as many (ideally all) swirl marks from the surface, you will lock in that glass like finish.
A Pro-Tip is to smooth out the surface as much as possible before the marine ceramic coating process as this will make it even easier when applying the ceramic coating.
We highly recommend the use of a Rupes polisher and foam pads near the end of the buffing process as this will help smooth out the surface imperfections, remove any swirl marks from the surface and boost the shine (with the use of compound and/or polish).